
Resources
- Moon by Simon Wedege (license)
- Mars by Wikimedia Commons (license)
- Green Hills by Alfred Borchard (license)
- Clouds from above by Sune Petersen (license)
- Seagulls by Image*After (license)
Preview
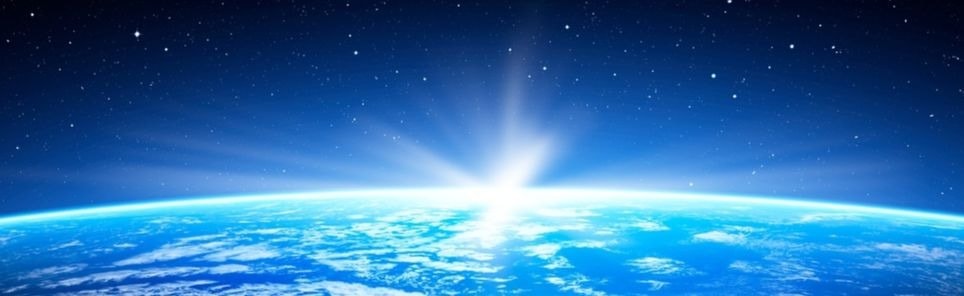
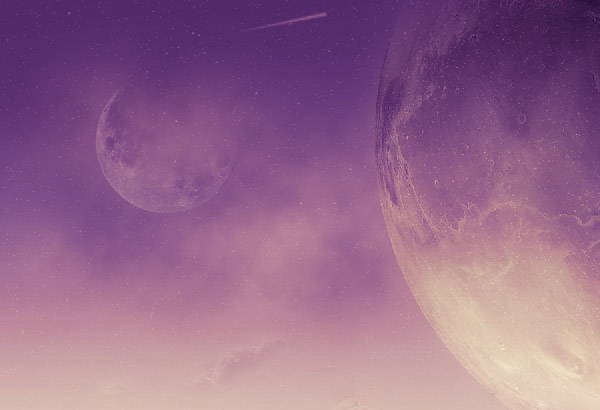
You can click on the image preview to see the full 1200 x 1200px image that we’ll be creating together. 
Step 1: Set up the Photoshop canvas
We are going to start this tutorial off by creating a new Photoshop document that’s 1200 x 1200px in dimension, with a White background. 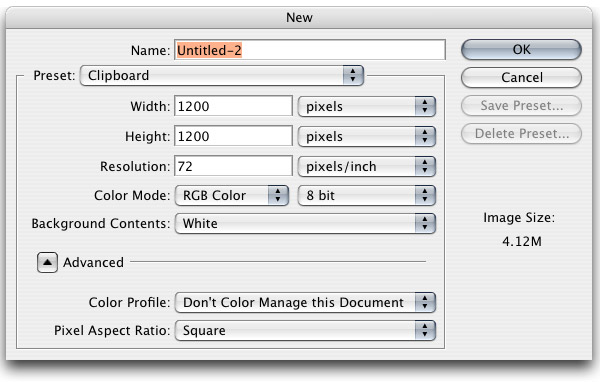
Step 2: Bring in and position the landscape image
Let’s bring in our landscape image and use the Free Transform command (Ctrl/Cmd + T) to size it and fit it to the width of our canvas.
We are also going to move the photo down so that the barn/shed will be at the bottom left corner of our canvas, using the Move Tool (V). 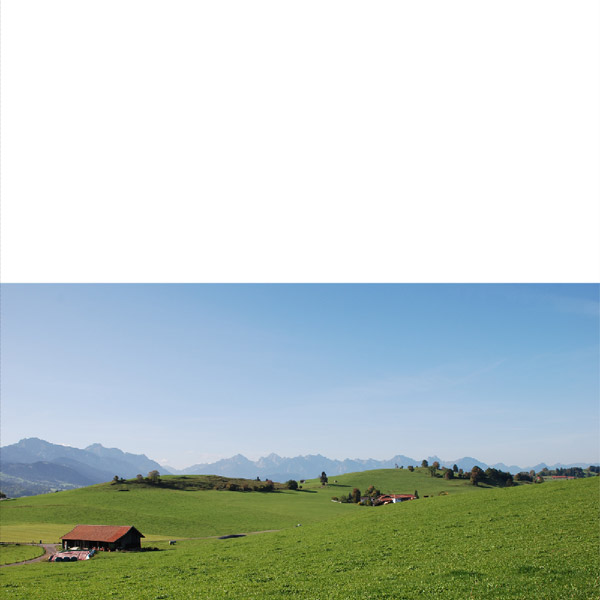
Step 3: Mask and apply a gradient on the sky
We are going to start working on the sky. First off, we are going to create a mask on the landscape image.
To create the mask, click on the Add vector mask button at the bottom of the Layers Panel. Click on the Gradient Tool (G) and, using a Black to 0% opacity gradient, click and drag the gradient from the top of the photo to about where the mountains start. 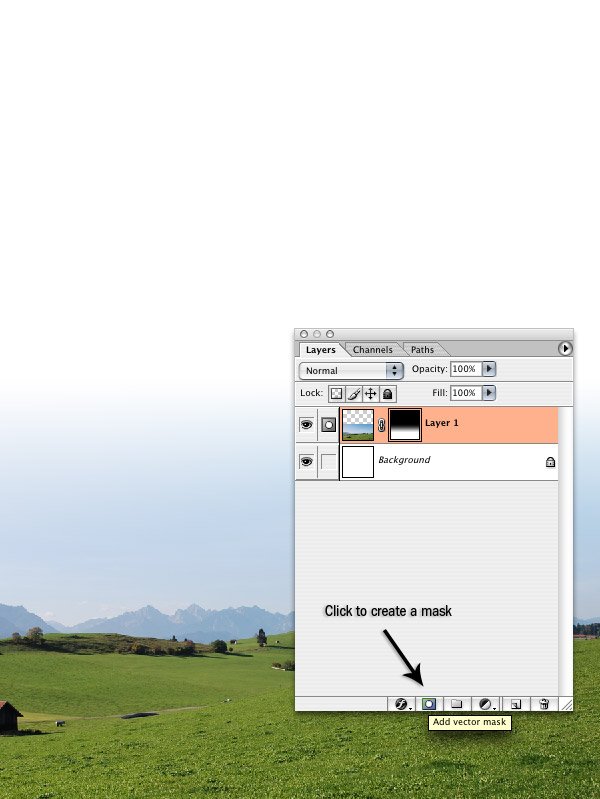
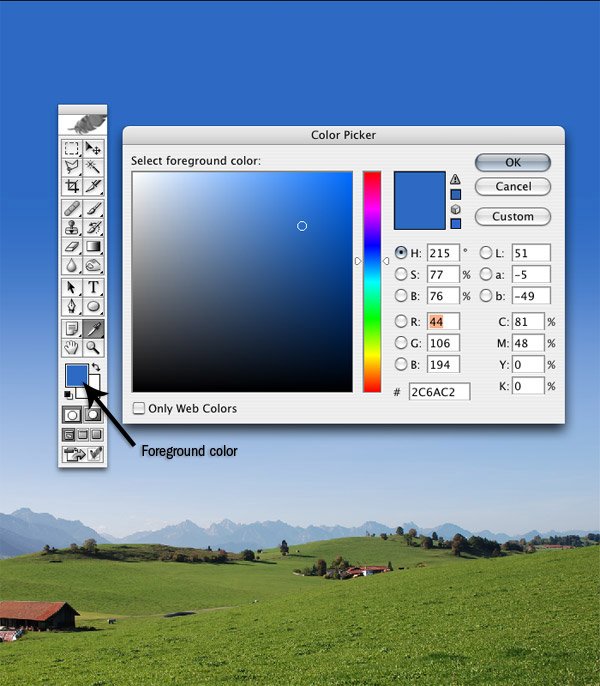
Step 4: Create a Blue Sky Gradient
Now we are going to create a sky gradient for the top of the canvas.
Create a new layer (Ctrl/Cmd + Shift + N) just above the landscape photo layer. Change your Foreground color to a blue color, something like what I have (#2C6AC2). Use the Gradient Tool (G) and drag a gradient from about a third of the way down the canvas to about where the mountains are.
Step 5: Create darker blue sky gradients
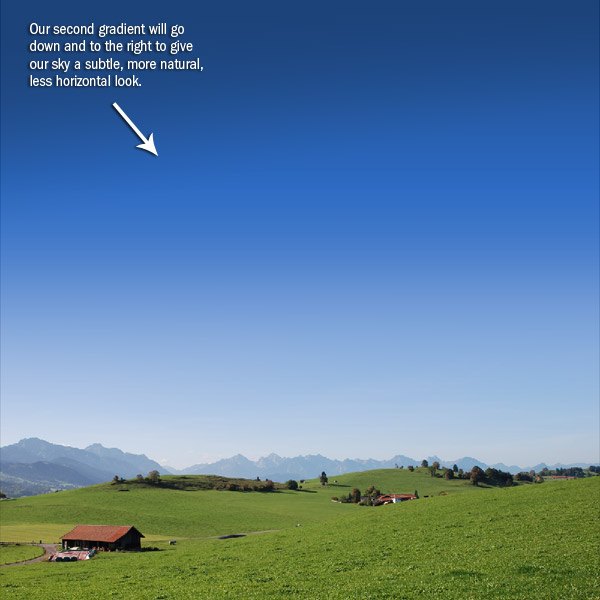
Create a new layer (Ctrl/Cmd + Shift + N) on top of the gradient layer that we just made. Using a darker blue color (#1C4379) for your Foreground color, make another gradient from the top of the canvas to about a third of the way down. 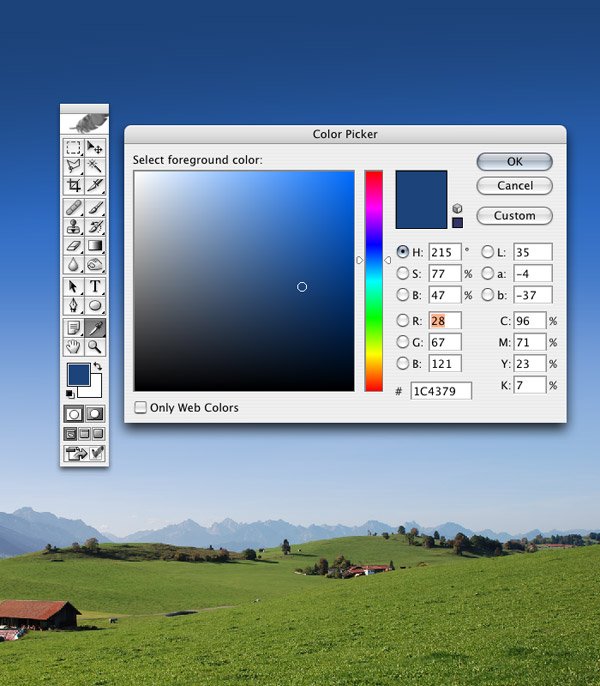 We are going to create another color gradient using the same process, but this time it will be at a slight angle from the left to right so that we have a little more of a natural feel.
Step 6: Change the color of the image
Now we are going to give our image a dramatic color change to give our image the look we are going for. We’re going to do this by adding a couple of adjustment layers. The color change will give the photo a surreal and mysterious look.
To change the color, click on the Create new fill or adjustment layer icon at the bottom of the Layers Panel and choose Hue/Saturation. Drop the saturation to about -77. 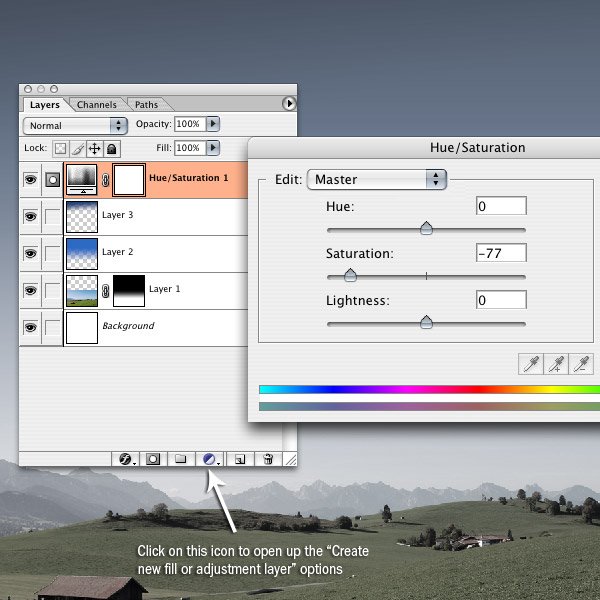
Step 7: Add a gradient map
Click on the Create new fill or adjustment layer icon at the bottom of the Layers Panel again, and this time go to Gradient Map.
Click on the gradient and make the color on the left a purple (#9A00CC) and the color on the right an orange-yellow (#FFD43D). The Gradient Map should be the topmost layer first and the Hue/Saturation below it in the Layers Panel. 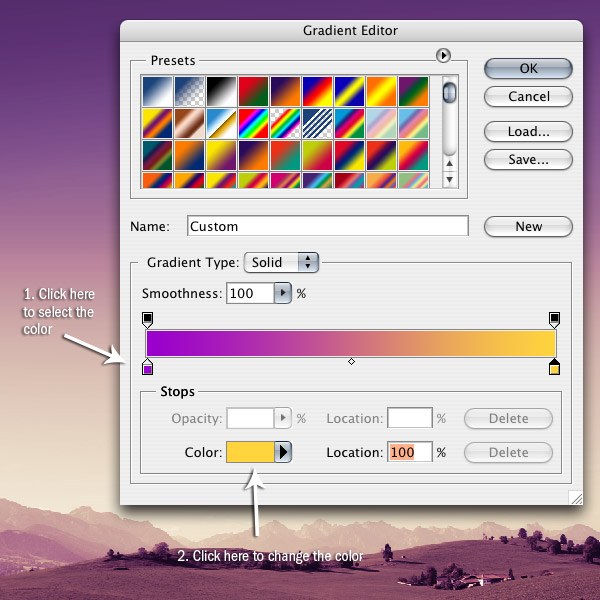
Step 8: Bring in the main planet
Now we are going to bring in our main planet.
For this, we are going to use our mars image. Open up the mars image in Photoshop so we can cut it out of its black background. 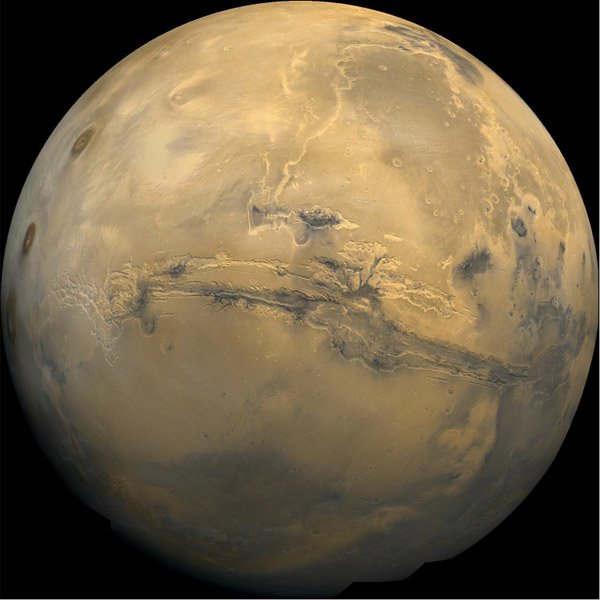
Step 9: Prep the main planet
Click on the Ellipse Tool (U) and select the Paths icon in the Options menu (usually at the top of the screen).
Holding down Shift, click and drag a circle around the planet. Use Free Transform (Ctrl/Cmd + T) to adjust the edge of the ellipse so that it lines up with the edge of the planet. 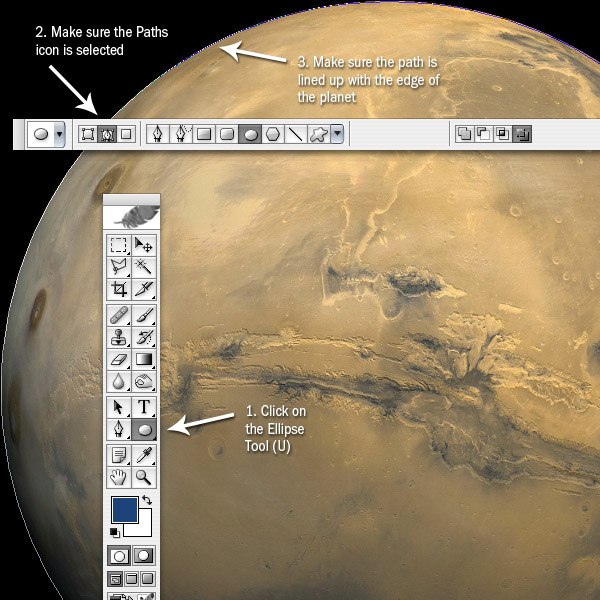
Step 10: Incorporate the main planet into the canvas
Click on the Paths tab at the top of the Layers Panel and Ctrl/Cmd-click on the work path.
This should bring up a marquee around the planet. An alternative way of making the marquee selection is by right-clicking inside the path your just drew, and then Make Selection in the contextual menu that appears. Use the Move Tool (V) to then click and drag the planet into our main canvas, positioning it somewhere on the top right.
Use Free Transform (Ctrl/Cmd + T) to shrink the planet down so that it fits above the landscape photo. We are also going to rotate the planet so the brightest part is facing the left side of the canvas. 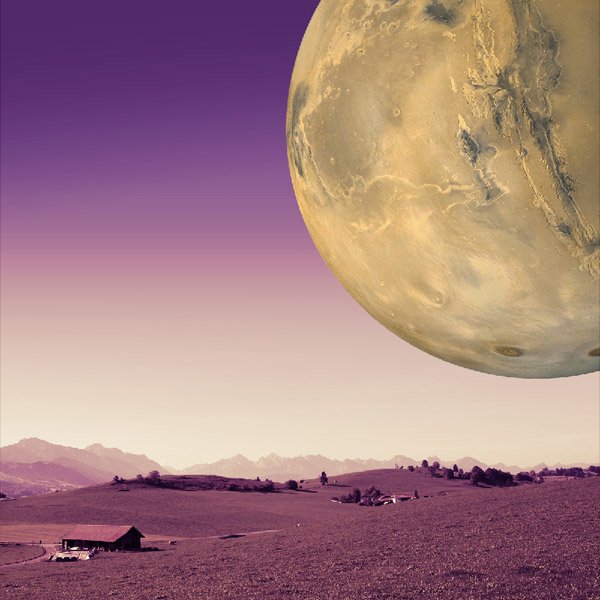
Step 11: Change the color of the main planet
Drag the planet layer so that it’s below the two adjustment layers (it should be the third layer from the top).
Change blending mode of the layer to Overlay. 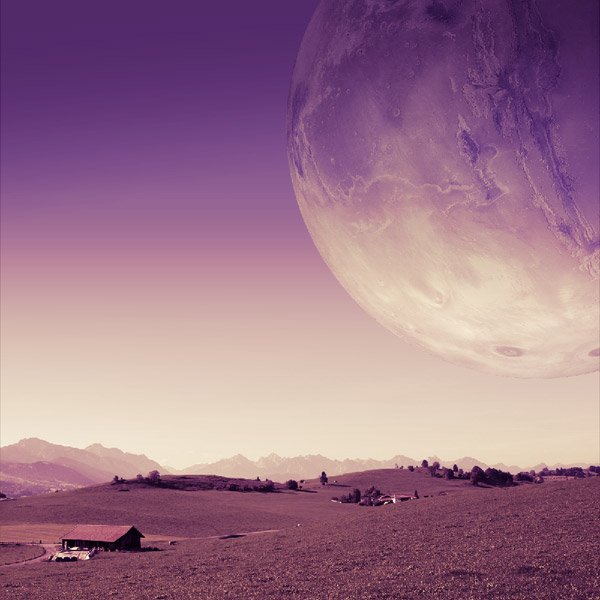
Step 12: Add some layer styles to the main planet
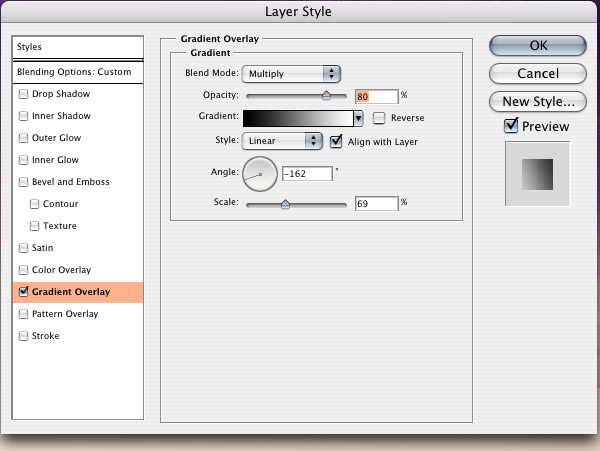
We are now going to add some layer styles to the planet. Click on the Add a layer style button at the bottom of the Layers Panel (the first icon from the left) and click on Gradient Overlay.
 Go back into the Layer Styles dialog box by clicking on the Add a layer style button again, but this time, choose Outer Glow. We are going to give our planet a very slight glow from behind.
Step 13: Mask out the bottom
We are going to mask out the top and bottom of the planet to make it look like it is fading into the darkness at the top and into the light at the bottom.
First, we are going to add a layer mask, which is at the bottom of the Layers Panel; click on the Add a layer mask button at the bottom of the Layers Panel. Using the Gradient Tool (G) with a Black to 0% opacity gradient, click and drag a gradient from the bottom up into the planet for the bottom and from the top down for the top of the planet. Play around, use undo if you have to, until you get something like what I have.

Step 14: Make some stars
Now we are going to add some stars to our piece. To add the stars, we are first going to create a new layer (Ctrl/Cmd + Shift + N) and move it just below the planet layer. Fill the entire layer by pressing Ctrl/Cmd + A to select the entire canvas and then Shift + F5 to open the Fill dialog box.
Fill the layer with black (#00000). Then go into Filter > Noise > Add Noise. 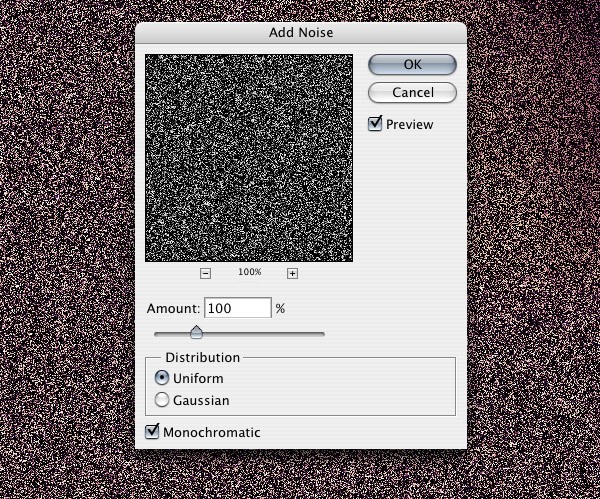 Go into the Levels dialog box (Ctrl/Cmd + L) and adjust it so that you have something like I have with the input levels around 241, 0.32 and 253.
This will get rid of some of the noise, which will tone down the amount of stars and make it a little more realistic. 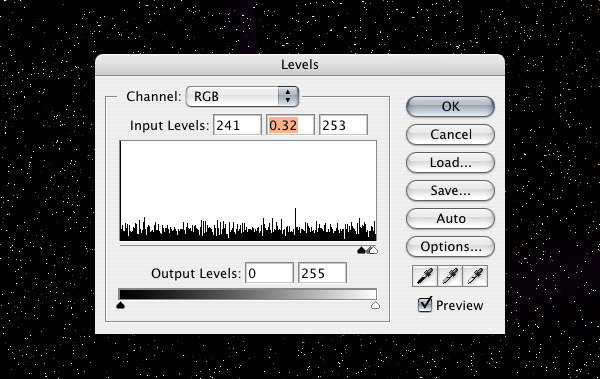
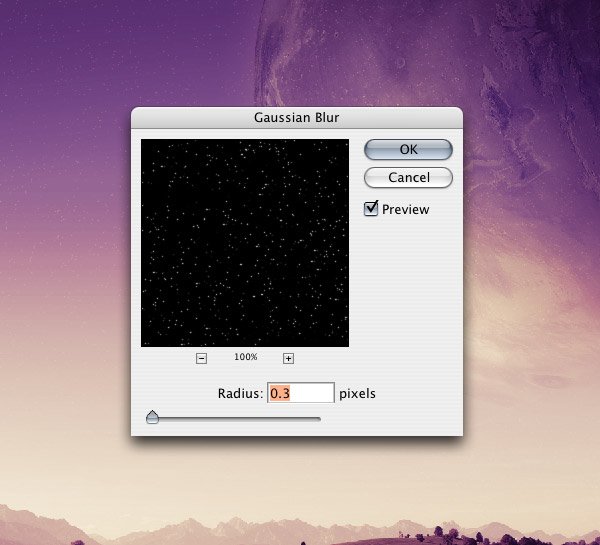
Step 15: Soften the stars
Change the blend mode of the stars to Screen and drop down the opacity to around 20%. Go into Filter > Blur > Gaussian Blur and adjust the Radius to 0.3px to give the stars a little more subtle look and so they aren’t as sharp looking.
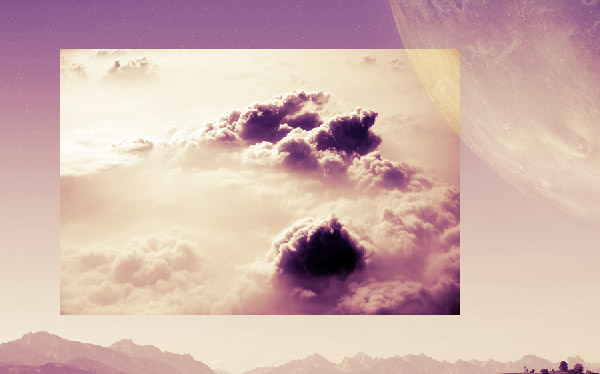
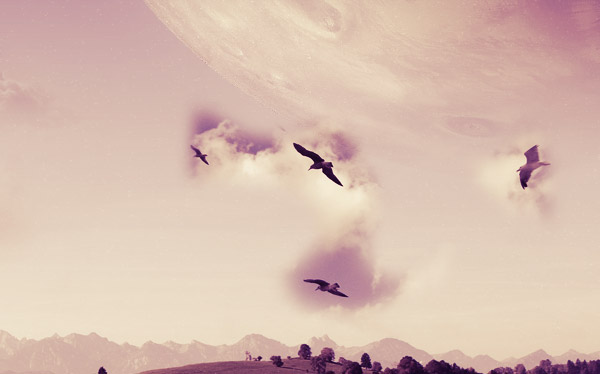
Step 16: Add more clouds
Now we are going to start adding more earthy elements. We are going to start out by getting some clouds and bringing them into our canvas. The clouds should go just above the star layer.
 Click on the Add a layer mask button at the bottom of the Layers Panel and select the Brush Tool (B). Change your foreground color to black, the brush hardness to 0% and the opacity to 100%. Now start painting away the areas around the clouds quickly.
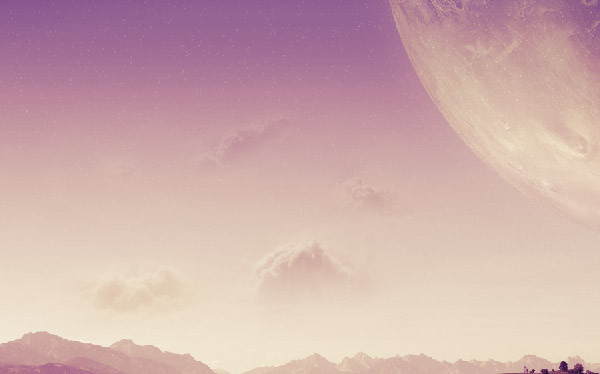
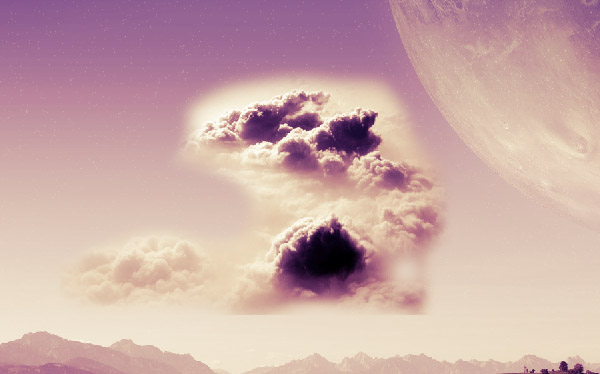 Once we get the general area of our clouds, we want to drop the brush opacity to 20% and start slowly painting away our detailed areas. Don’t worry about painting over the clouds too much because we are going to end up with subtle clouds anyways. The more time you put into this, the better it will come out.
Step 17: Add some birds
We are going to add some birds to the right of the clouds the same way we made the clouds in Step 16. 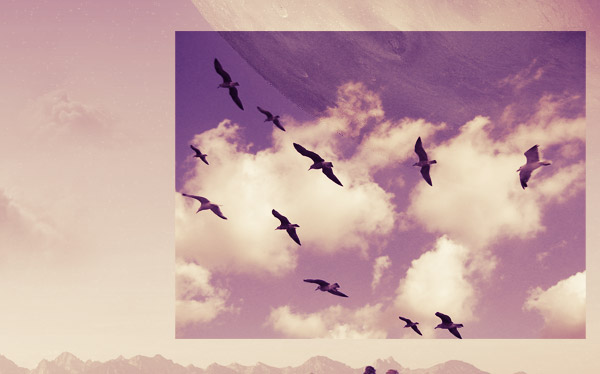
 I adjusted the hardness of my brush between 0% and 50% to get sharper and more defined edges on the birds. Watch out and make sure that the birds don’t have a light glow or dark rings around them. Once you think you are done, zoom out and check to see if you can see any dark or light areas around the birds that don’t look like they should be there.

Step 18: Add the second planet
Lets go ahead and add a second planet. Open up the moon image in Photoshop. Repeat steps 8-11 to cut out the planet and bring it into our canvas.
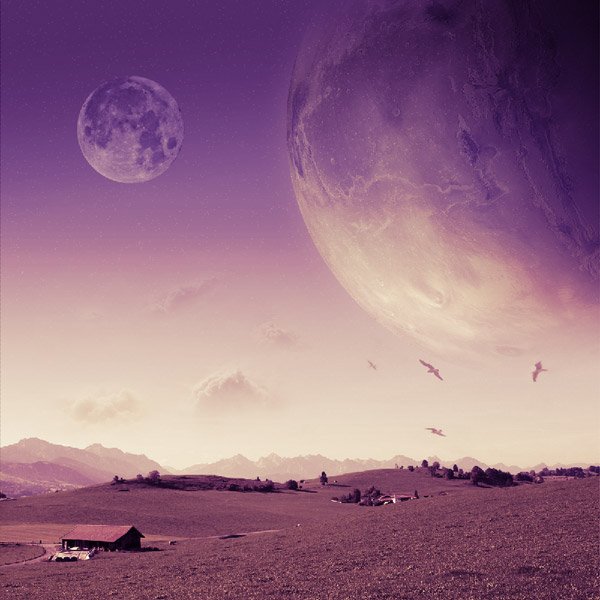
Step 19: Enhance the second planet
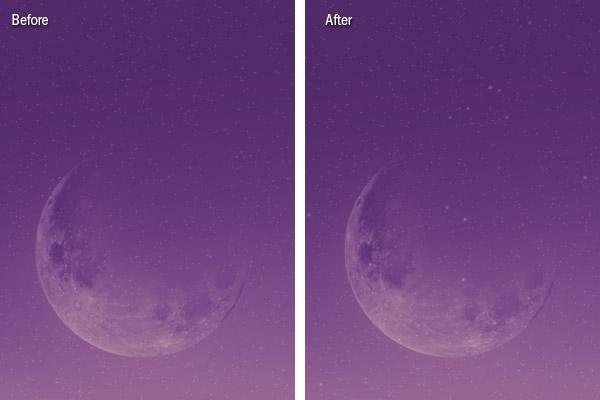
First, give the moon the same Outer Glow as in Step 12. Now we are going to mask out the top right corner of the moon. Click on the Add a layer mask button at the bottom of the Layers Panel. Ctrl/Cmd + click on the planet’s layer in the Layers Panel so that a marquee selection comes up around it.
Click on the mask part of the layer and fill it with black (#000000). This should make the planet disappear. Use Ctrl/Cmd + D to deselect the selected area.
Click the link symbol in between the mask and the moon thumbnail in the Layers Panel to make the link symbol go away. Getting rid of the link will separate the two layer elements on their own layers. Click on the mask part of the layer, then click on where the moon was and click and drag up and towards the right.
This will make some of the moon reappear. 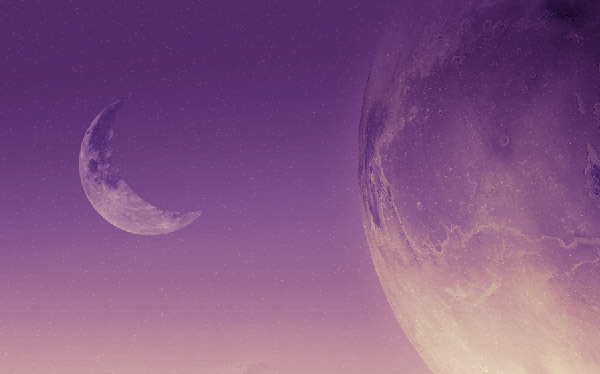 Now make sure you have the mask selected. Go to Filter > Blur >Gaussian Blur and change the radius to 20px.
Click on the moon part of the layer and drop the opacity to 70%. 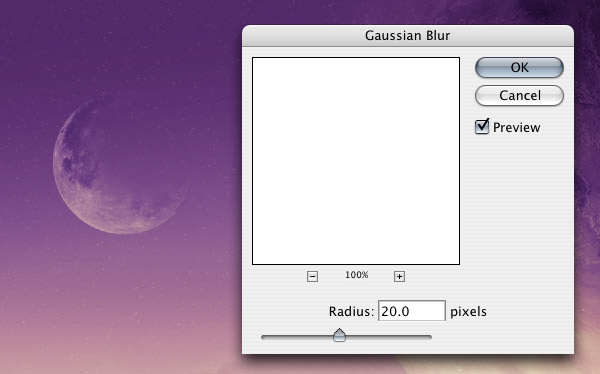
Step 20: Paint in more stars
We are going to add a few more little things to finish off our space landscape. First, select the Brush Tool (B) and create a new layer (Ctrl/Cmd + Shift + N).
Change the brush size to 4px with a hardness of 0%. Now start painting some stars around the top half of the canvas. This will give some varied sizes to our stars.
Step 21: Create a shooting star
Now we are going to make a shooting star in the distance at the top of our canvas. Using the Polygonal Lasso Tool (L), make a wide sideways cone shape. Fill the shape with white (#FFFFFF).
Using the Free Transform command, (Ctrl/Cmd + T) squeeze the top down and the sides until you get a thin shape. Angle the shape so the larger part is facing up, and drop the opacity of the layer down to 20%. 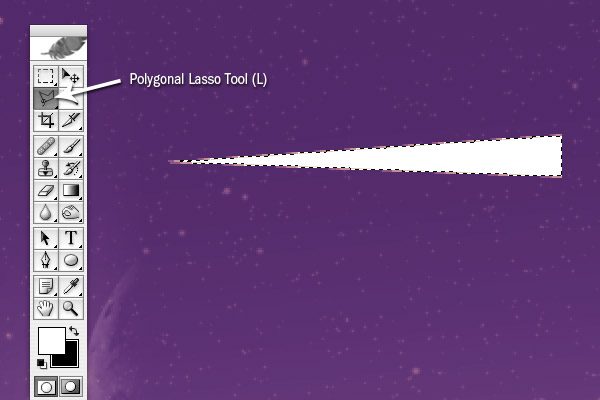
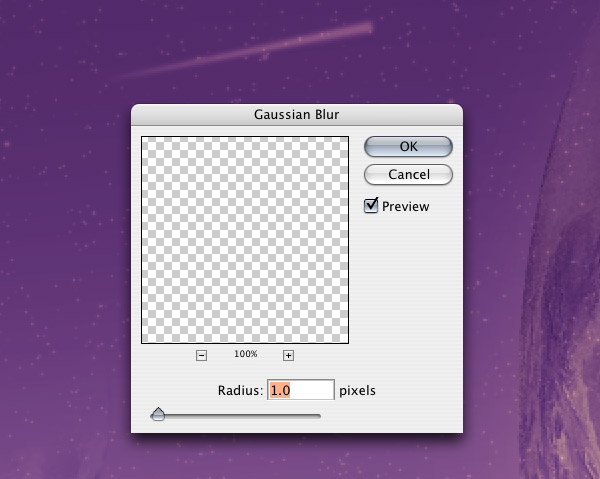
Step 22: Apply a Gaussian blur
Go to Filter > Blur > Gaussian Blur and adjust the radius to 1.0px to get rid of the hard edges.
Step 23: Make some space dust
Now we are going to make some “space dust”. Create a new layer and move it in front of the two planets. Make sure your foreground color is black (#000000) and the background color is white (#FFFFFF). Using the Lasso Tool (L) with a feather of 50px to make a natural cloud shape over the two planets.
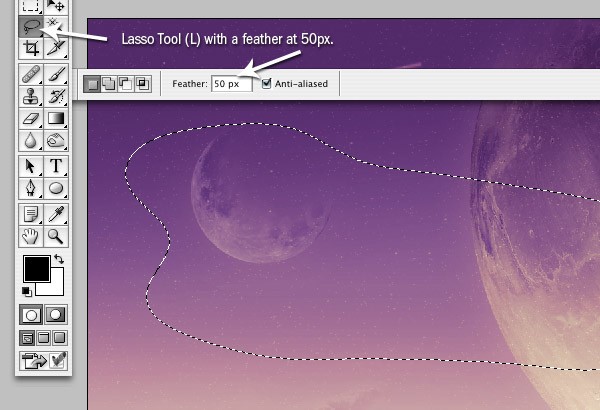 Go to Filter > Render > Clouds. Drop down the opacity to 20%. You should end up with something similar to what I have below.
Step 24: Drop down the opacity
The last thing we are going to do is drop the opacity of the landscape photo to 80% to give it a faded out look, like everything else has. 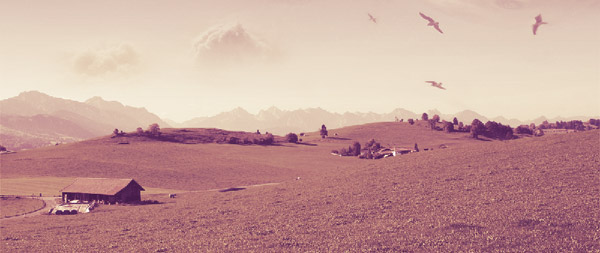
Conclusion
In this tutorial, I showed you how to create a realistic-looking space scene photo manipulation digital art piece. We brought together five stock photos and blended them together seamlessly.
You also saw how to paint some stars in using a couple of techniques. I hope you enjoyed this tutorial and look forward to your comments. I’m looking forward to hearing your thoughts in the comments!
Download Source Files
-
 Trevin serves as the VP of Marketing at WebFX. He has worked on over 450 marketing campaigns and has been building websites for over 25 years. His work has been featured by Search Engine Land, USA Today, Fast Company and Inc.
 -

WebFX is a full-service marketing agency with 1,100+ client reviews and a 4.9-star rating on Clutch! Find out how our expert team and revenue-accelerating tech can drive results for you! Learn more
Make estimating web design costs easy
Website design costs can be tricky to nail down. Get an instant estimate for a custom web design with our free website design cost calculator!
Try Our Free Web Design Cost Calculator
Table of Contents
- Resources
- Preview
- Step 1: Set Up the Photoshop Canvas
- Step 2: Bring in and Position the Landscape Image
- Step 3: Mask and Apply a Gradient on the Sky
- Step 4: Create a Blue Sky Gradient
- Step 5: Create Darker Blue Sky Gradients
- Step 6: Change the Color of the Image
- Step 7: Add a Gradient Map
- Step 8: Bring in the Main Planet
- Step 9: Prep the Main Planet
- Step 10: Incorporate the Main Planet into the Canvas
- Step 11: Change the Color of the Main Planet
- Step 12: Add Some Layer Styles to the Main Planet
- Step 13: Mask out the Bottom
- Step 14: Make Some Stars
- Step 15: Soften the Stars
- Step 16: Add More Clouds
- Step 17: Add Some Birds
- Step 18: Add the Second Planet
- Step 19: Enhance the Second Planet
- Step 20: Paint in More Stars
- Step 21: Create a Shooting Star
- Step 22: Apply a Gaussian Blur
- Step 23: Make Some Space Dust
- Step 24: Drop Down the Opacity
- Conclusion
- Download Source Files
Share this article


Web Design Calculator
Use our free tool to get a free, instant quote in under 60 seconds.
View Web Design Calculator
Make estimating web design costs easy
Website design costs can be tricky to nail down. Get an instant estimate for a custom web design with our free website design cost calculator!
Try Our Free Web Design Cost Calculator