Table of Contents
- Preview
- Preliminary Step: Research
- Step 1: Draw the iPhone Face
- Step 2: Create the iPhone’s Side
- Step 3: Shading the iPhone’s Side
- Step 4: Create a Hard Edge
- Step 5: Applying a Stainless Steel Texture
- Step 6: Create an Inset Edge
- Step 7: Darken the Lower Part
- Step 8: Create the Screen of the iPhone
- Step 9: Give the Screen an Inner Shadow
- Step 10: Add a Wallpaper
- Step 11: Create a Reflection on the iPhone’s Face
- Step 12: Create an Edge Highlight on the iPhone Face’s
- Step 13: Draw the Home Button
- Step 14: Draw the Front Camera
- Step 15: Draw the Receiver
- Step 16: Draw the Ring/Silent Switch
- Step 17: Draw the Volume Buttons
- Step 18: Create a Divider
- Step 19: Creating a Realistic Shadow
- Tutorial Summary
- Download Source Files
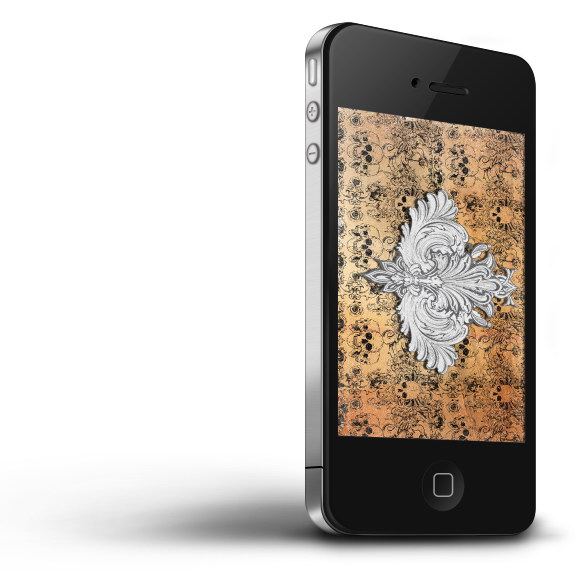
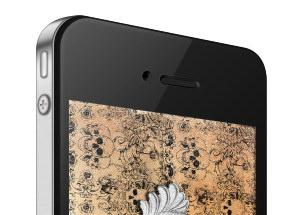
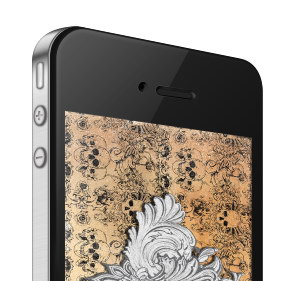
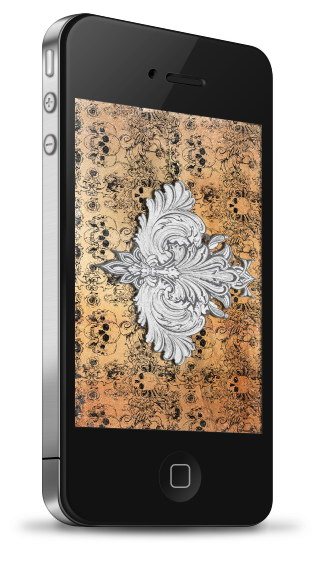
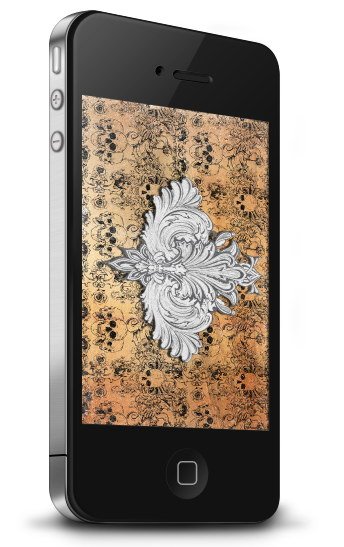
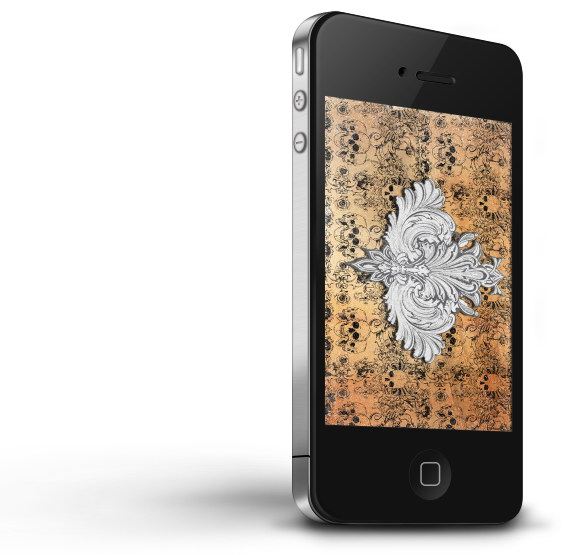
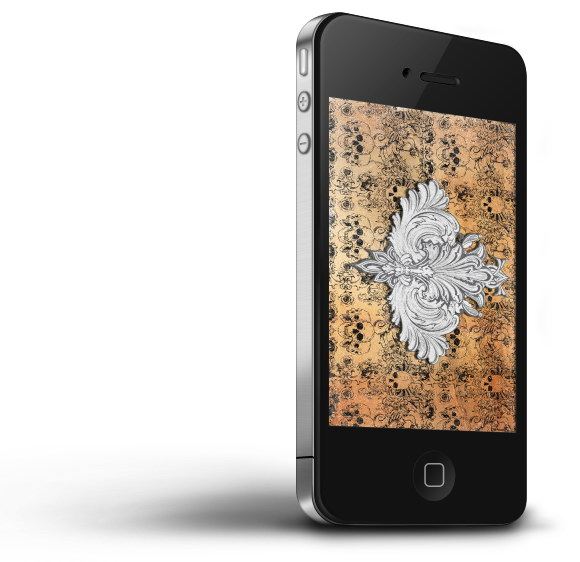
Preview
Preliminary Step: Research
Before drawing the iPhone, I suggest you search images of the iPhone and look at them. Getting familiar with the subject is a good preliminary step. For this particular example, check out Apple’s web pages for the iPhone as well as perform a Google Image search for “iPhone 4“.
Better yet: If you have a real iPhone, examine it.
Feel the phone’s textures and see how its various surfaces reflect light.
Step 1: Draw the iPhone Face
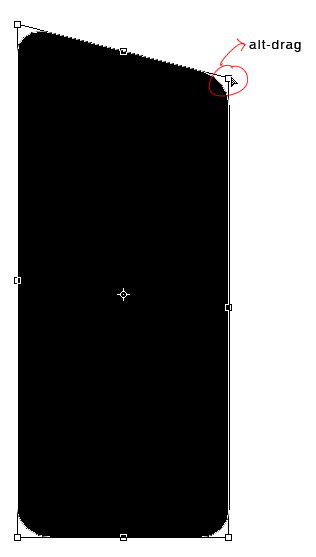
First, create a new Photoshop document with a canvas size of 1800x1600px. I always use a big canvas when drawing a realistic object because it helps me when drawing small details. Use the Rounded Rectangle Tool (U) with the Radius option at 60px and the Paths option selected to create a black rounded rectangle.

Hit Ctrl/Cmd + T to activate Free Transform.
Alt/Option + click-hold-and-drag down the top-right transform control to skew the shape.
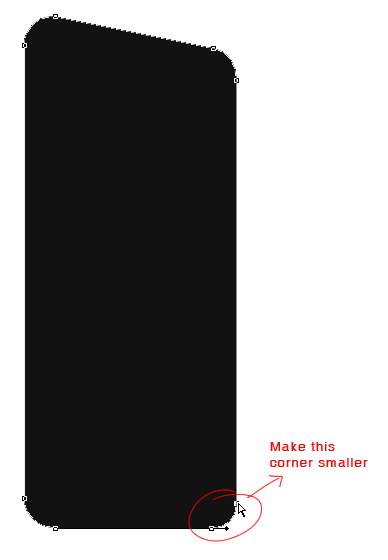
Remember the basic rule of drawing with accurate perspective: The farther the element, the smaller it should be. With that in mind, we should make the bottom-right corner a little smaller than the top-right corner.
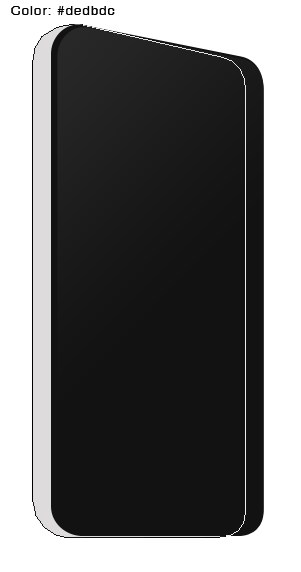
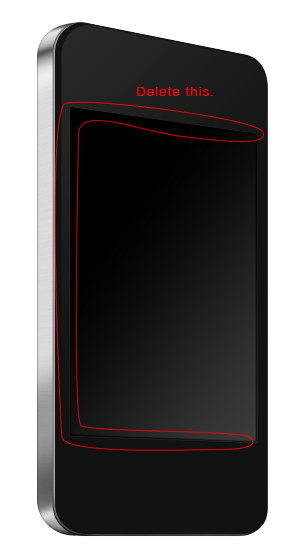
Duplicate the iPhone face. Use Free Transform to modify the duplicate shape; see the image below for reference.

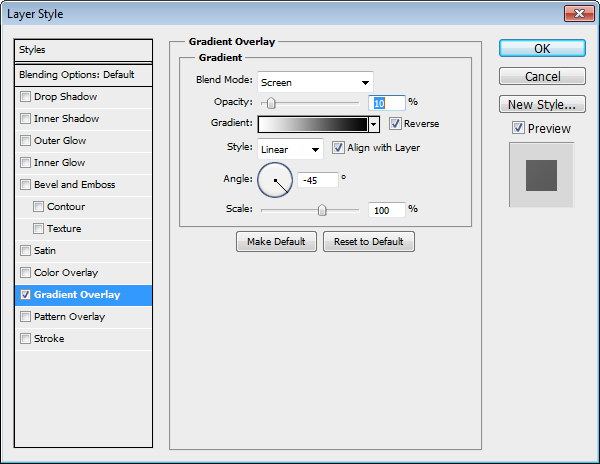
Give the duplicate a very subtle Gradient Overlay.
This is the basic shape of the iPhone face:

Step 2: Create the iPhone’s Side
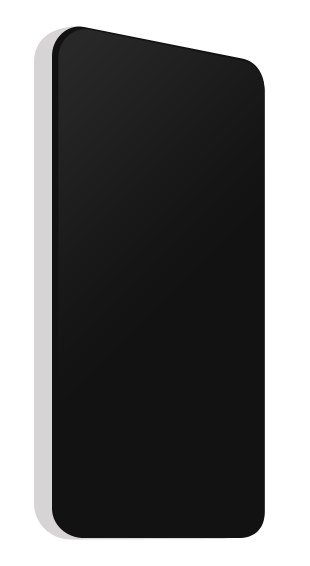
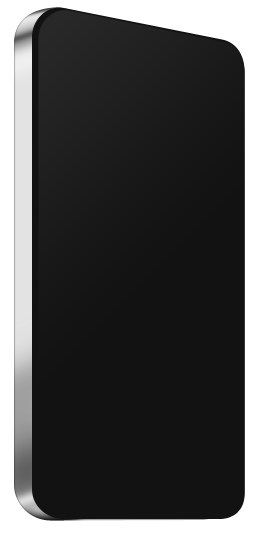
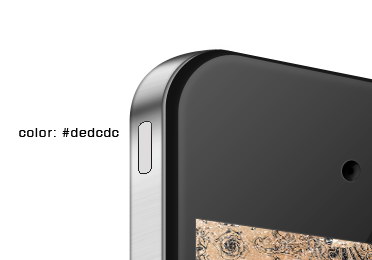
Let’s create the side of the iPhone, technically called the iPhone 4’s band, which is made of stainless steel. Duplicate the previous shape, put it behind the other shapes, and then move it to the left. Change its color to a light gray (#dedbdc).
Give the gray shape a Gradient Overlay.

Here’s where we are now:
Step 3: Shading the iPhone’s Side
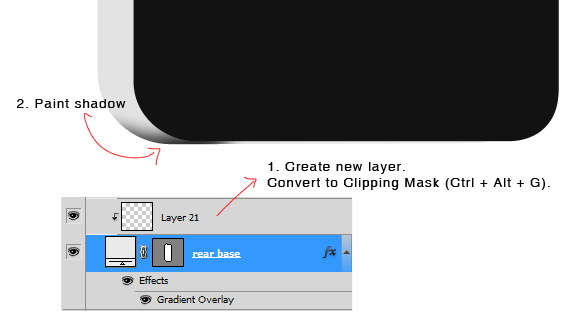
Create new layer and put it on top of the iPhone side layer.
Convert the new layer to a clipping mask by pressing Ctrl/Cmd + Alt/Option + G or right-clicking on the layer and choosing Create Clipping Mask. Creating a clipping mask makes sure everything we paint on the new layer will be within the sides of the iPhone.
Use the Brush Tool (B) with a soft brush set with the Opacity at 20-25% to paint a black shadow on the lower part of the iPhone.
Repeat this process to create more highlights and shadows. Use black for shadows and white for highlights.
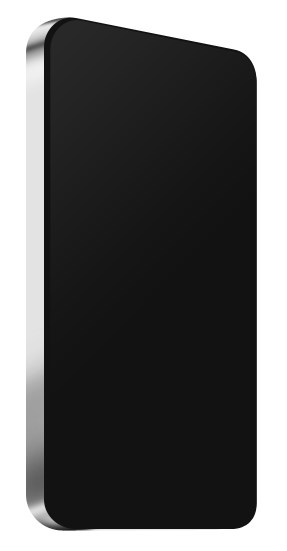
I suggest you use many layers and that you apply each brush stroke on a separate layer. This way, you can easily reduce a particular shadow or highlight’s effect by changing the layer’s opacity, make modifications to it with the Eraser Tool (E), or entirely deleting it if it doesn’t look good. I used about 10 layers to achieve the shading on the side; you can see the progression below:

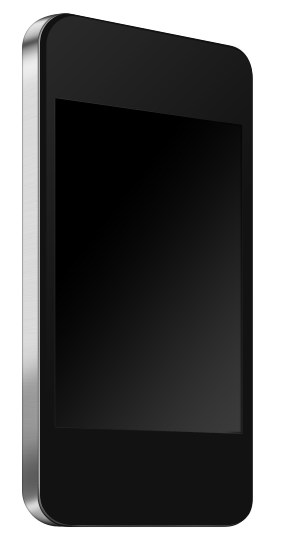
Here is our iPhone now:
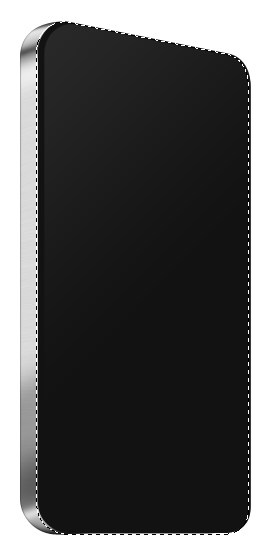
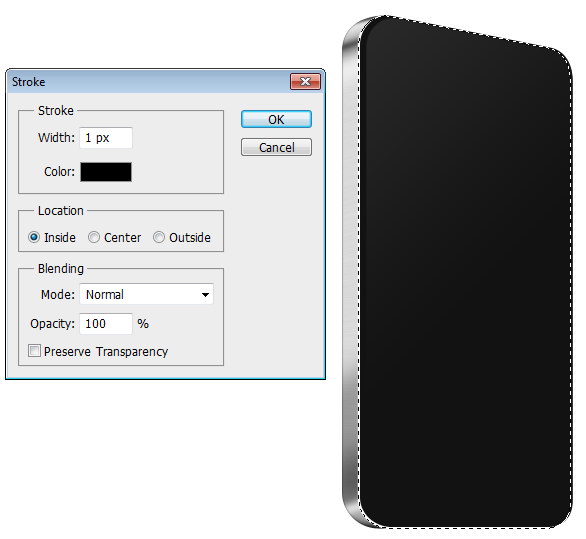
Step 4: Create a Hard Edge
Ctrl/Cmd + click the side layer to load a selection around the shape.

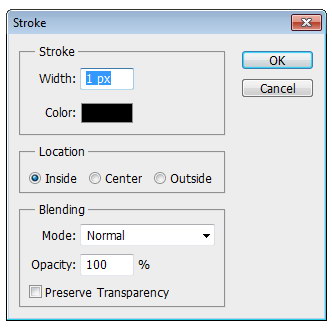
Create a new layer, then go to Edit > Stroke.
In the Stroke window, set Color to black, Width to 1px, and Location to Inside (so that the stroke is made inside the selection).
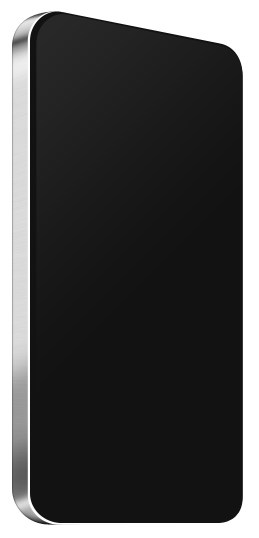
Our iPhone should now have a nice, solid edge.
Step 5: Applying a Stainless Steel Texture
The iPhone 4 is a bit different from other previous generations because of its stainless steel band, which apparently makes the mobile device structurally stronger. This band also acts as the iPhone 4’s antenna. Let’s create this stainless steel surface on the iPhone’s side.
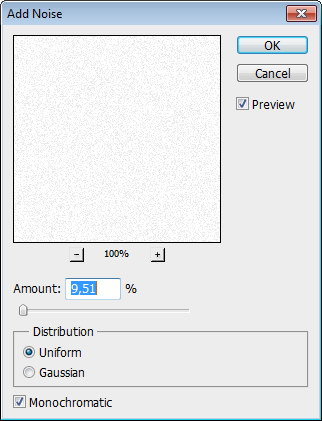
To start, create a new layer and fill it with white.
Next, go to Filter > Noise > Add Noise.
Then, go to Filter > Blur > Motion Blur.
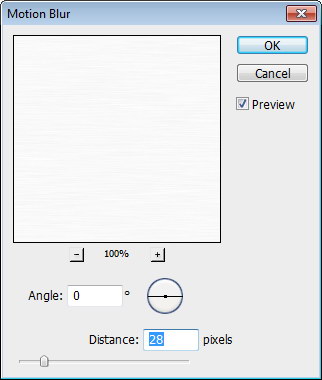
Place the layer on top of the side layer, but under all the highlight and shadow layers. Set the layer’s Blend Mode to Multiply.
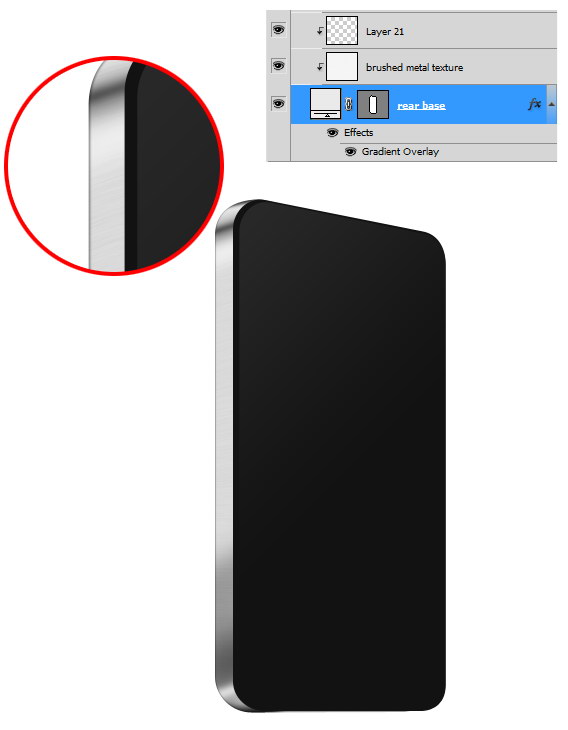
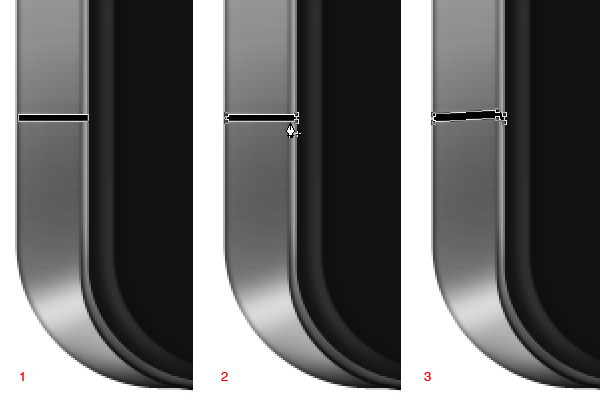
Step 6: Create an Inset Edge
Ctrl/Cmd + click on the iPhone face layer to load a selection around it. Move the selection 2px to the left using your arrow keys.
Create a new layer and fill the selection we made with white.
Ctrl/Cmd + click on the layer we have just created in the previous step to create a selection around the inset edge.
Create new layer. Go to Edit > Stroke, and set Width to 1px, Color to black, and Location to Inside.
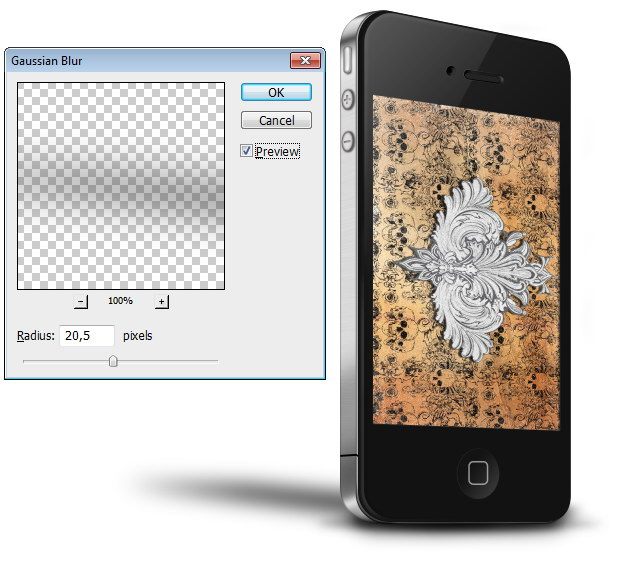
Go to Filter > Blur > Gaussian Blur to soften the stroke.

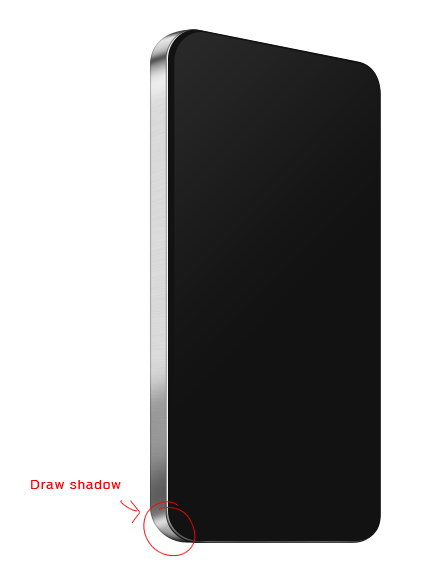
Step 7: Darken the Lower Part
Use the Brush Tool (B) to paint a shadow to darken the lower part of the iPhone.
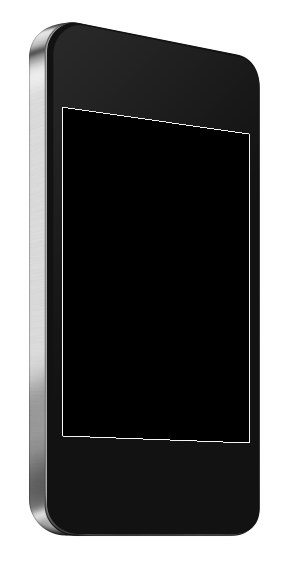
Step 8: Create the Screen of the iPhone
Create a black rectangle and then use Free Transform (Ctrl/Cmd + T) to modify the rectangle’s perspective to match the iPhone’s face.
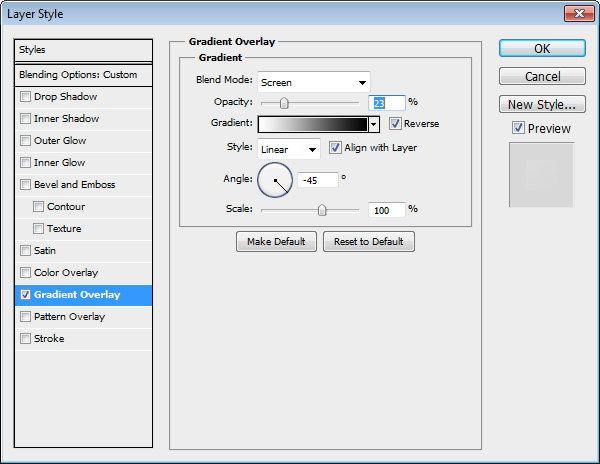
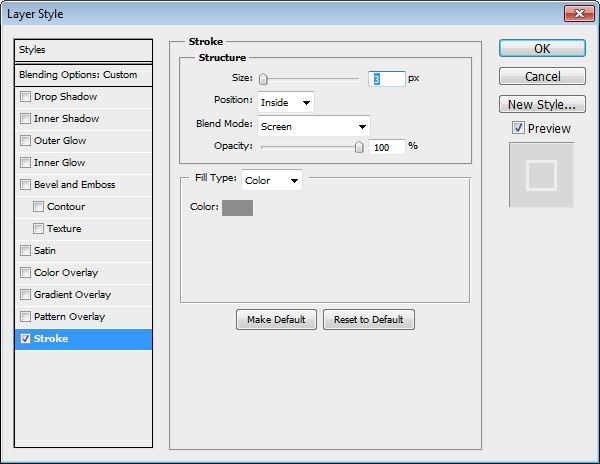
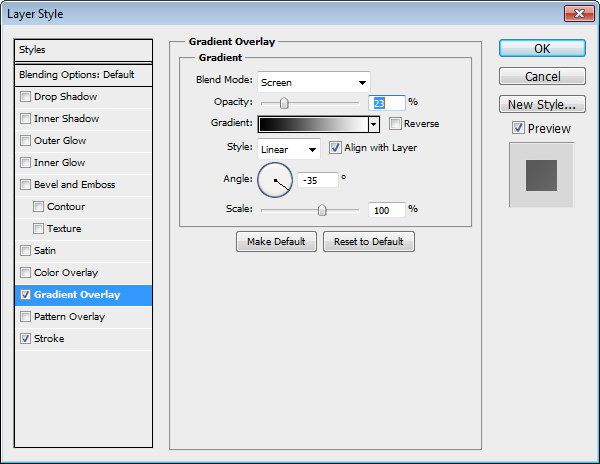
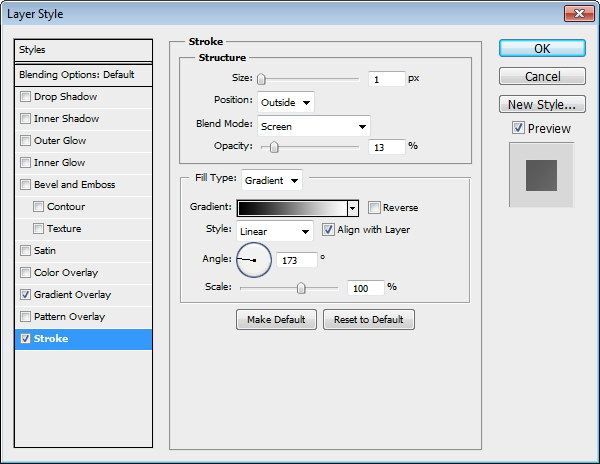
Double-click on the layer to open the Layer Style window, and then give the layer a Gradient Overlay and Stroke.
Gradient Overlay

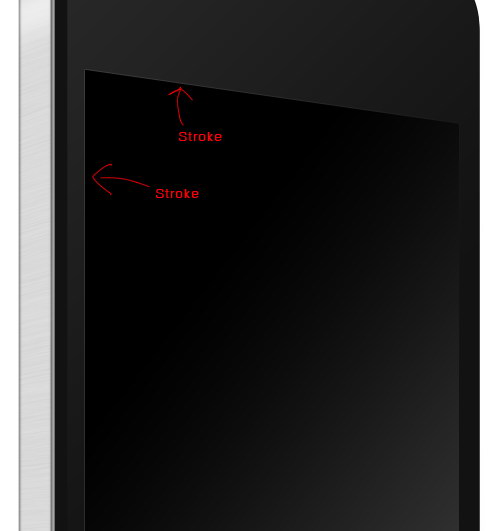
Stroke
Note that this stroke has a Fill Type of Gradient so that the stroke matches our light source.

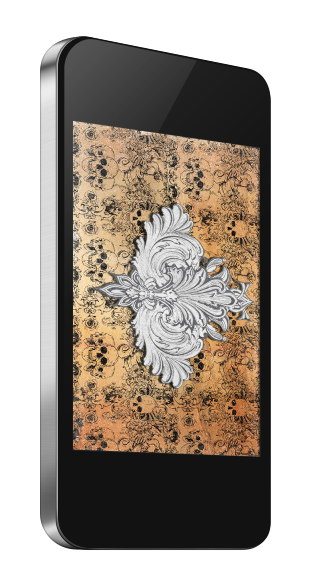
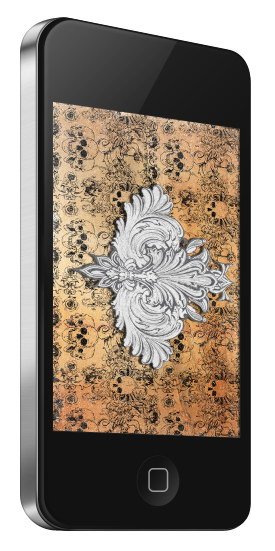
Here’s the result of the Gradient Overlay/Stroke layer style:
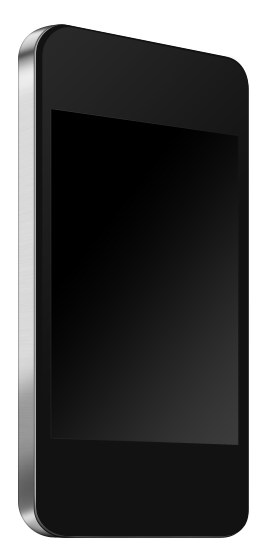
The following image is a close-up view. As you can see, the stroke layer effect is giving the screen a nice, 1px highlight at the top-left of the screen.
Step 9: Give the Screen an Inner Shadow
We need to add an inner shadow inside the screen.
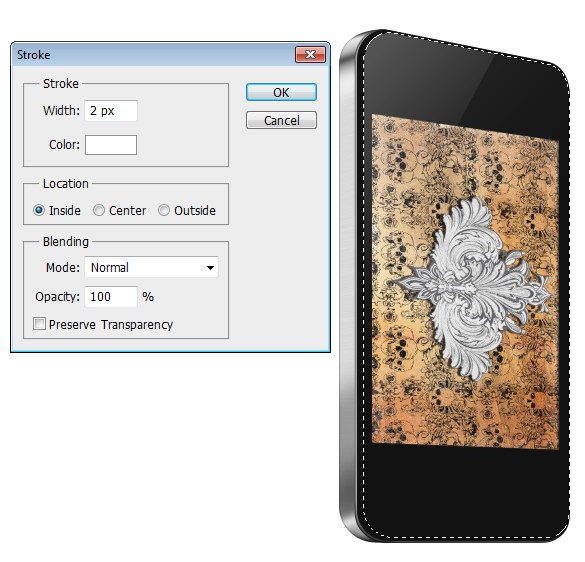
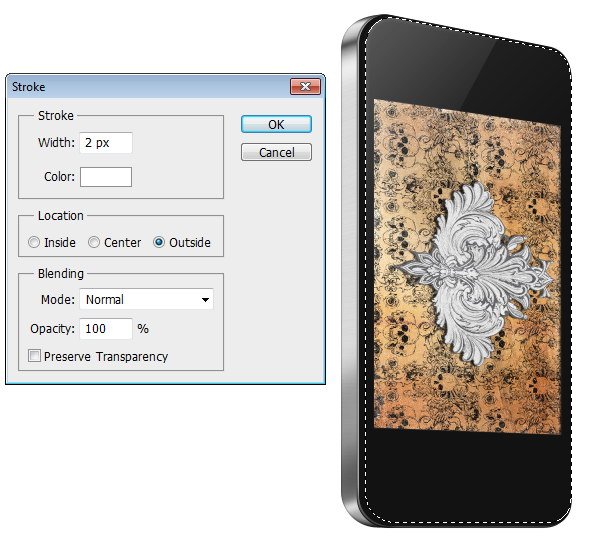
First, load a selection around the screen by Ctrl/Cmd + clicking the screen layer. Then, create a new layer and go to Edit > Stroke.

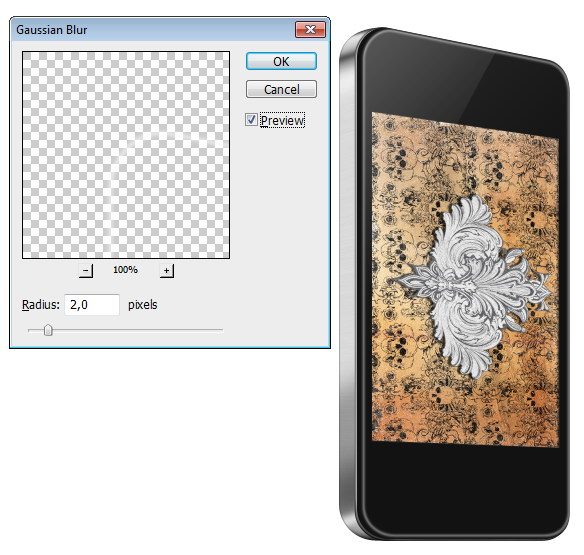
Soften the stroke with a Gaussian Blur.

We don’t need the inner shadow on some parts of the screen, so delete some of them using the Eraser Tool (E).
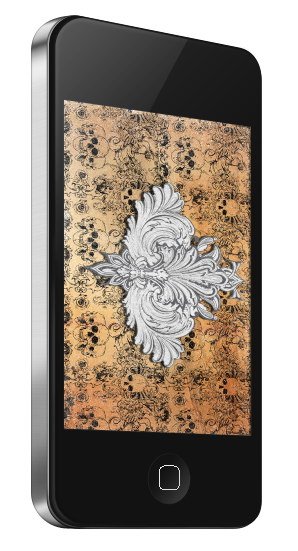
Here is our iPhone now:
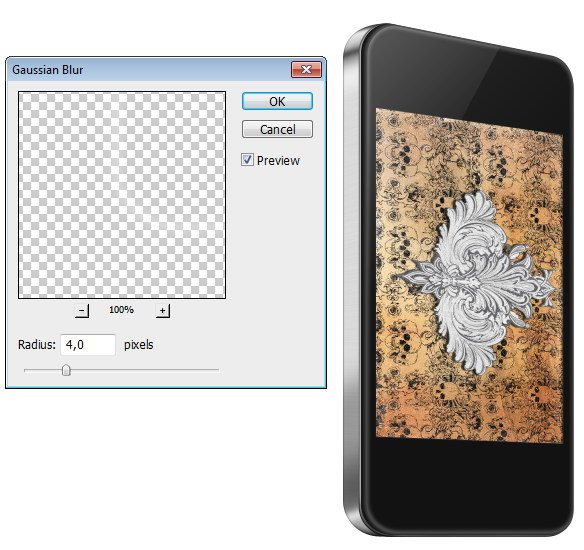
Step 10: Add a Wallpaper
Locate an image that can go on the iPhone screen (it should be placed below the inner shadow layer); modify it using Free Transform to match the size, scale, and perspective of the screen. This image will be the iPhone’s wallpaper.
The inner shadow we created in the previous step is a very small and subtle detail–you may not even notice it, but it’s the details that bring our work close to realism.
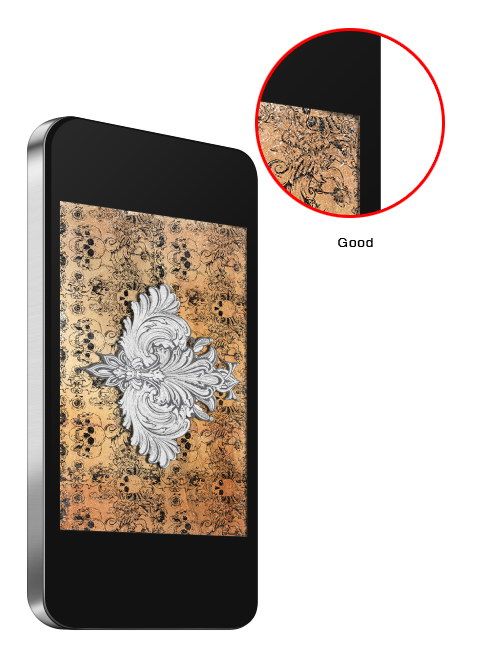
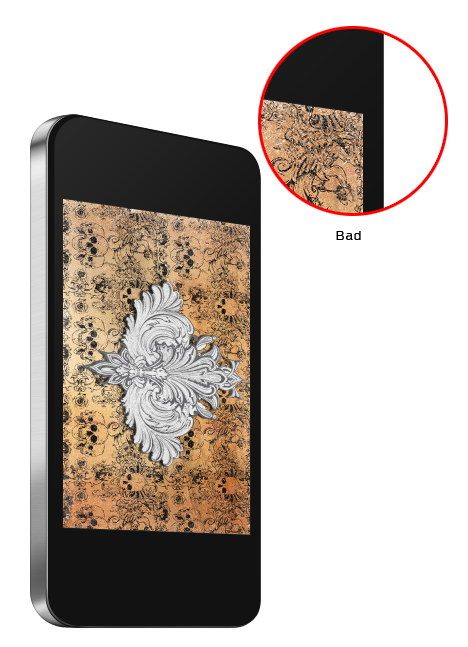
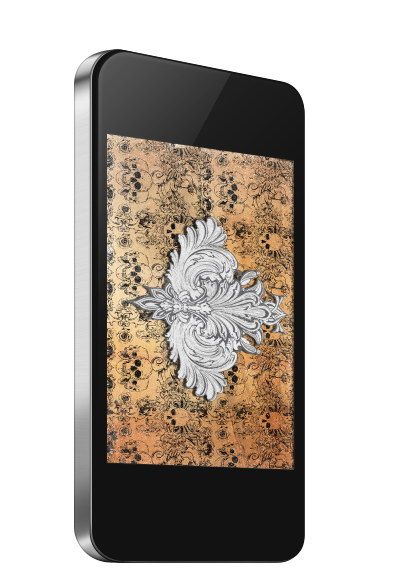
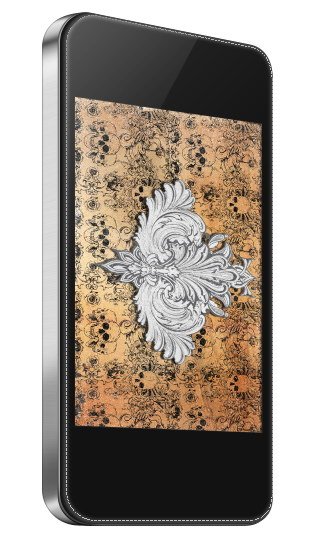
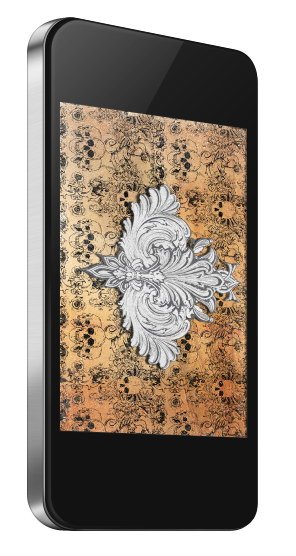
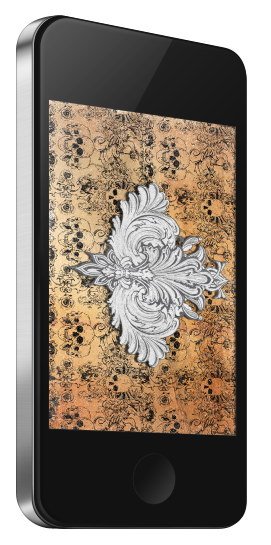
You can see the difference with and without the inner shadow when you add a wallpaper picture on the screen:
With Inner Shadow
Without Inner Shadow
Step 11: Create a Reflection on the iPhone’s Face
Duplicate the iPhone face shape. Use the Pen Tool with the Intersect path areas option selected in the Options Bar to create a triangular path on top of the iPhone face shape.
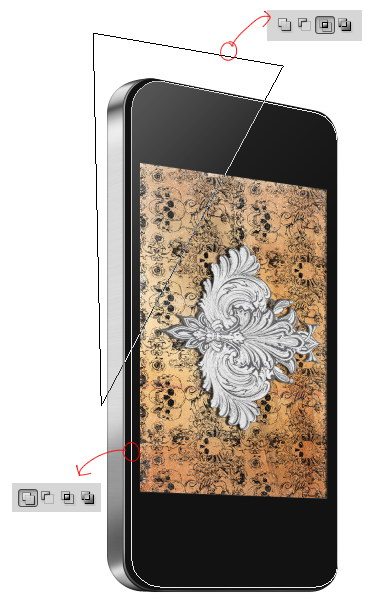
Add a Gradient Overlay to the layer.
As you can see below, we now have a nice surface reflection:
Step 12: Create an Edge Highlight on the iPhone Face’s
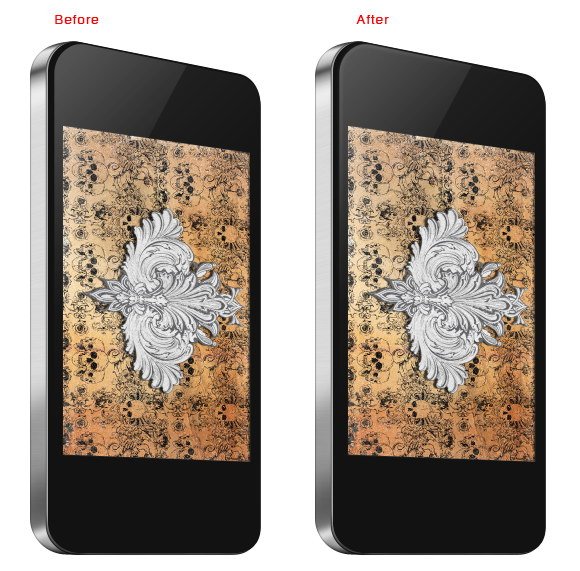
Next is adding a subtle highlight on edge of the iPhone’s face. Load a selection around the iPhone’s face and then give the selection a stroke (on a new layer).
Blur the stroke using the Gaussian Blur filter.
Reduce the layer’s Opacity to about 20%.
This very subtle detail reinforces the realism of what we are trying to produce–see the before and after difference:
We will layer this highlighting effect by repeating a similar process.
Load a selection around the iPhone’s face again, then give it a white stroke.
Apply the Gaussian Blur filter on the white stroke.
Now, we need to make sure that the highlight doesn’t spill into the iPhone screen. Create a selection around the iPhone screen and then invert the selection (Ctrl/Cmd + Shift + I). Click the Add layer mask button at the bottom of the Layers Panel to hide parts of the white highlight that spills into the screen.
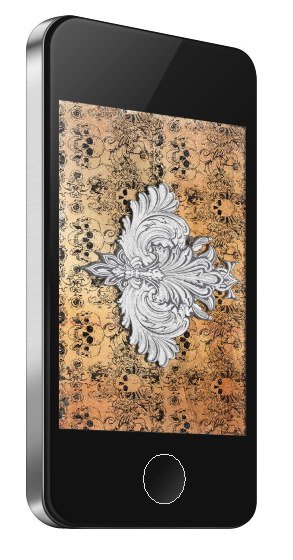
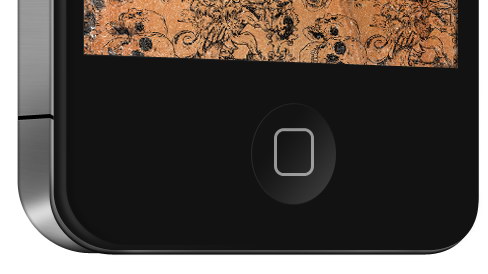
Step 13: Draw the Home Button
The contextual button at the bottom part of the iPhone is called the Home button and it serves a multitude of functions for operating the device.
To draw the basic shape of the Home button, use the Ellipse Tool (U) to draw a rounded shape under the iPhone screen. The Home button is actually a perfect circle when you look at it straight forward, but because of the perspective/angle of our iPhone, it should appear to be an ellipse.
Double-click on the Home button layer to access the Layer Style window. Give the layer a Gradient Overlay and Stroke.
Gradient Overlay

Stroke

Here is our (currently plain) Home button:
Draw a rounded rectangle path on top of the button (with a Fill to 0%).
Give the path a Stroke with Color at gray and Size at 3px.
Here is our Home button with its icon drawn:
Step 14: Draw the Front Camera
The iPhone 4 has two cameras: one in the back and one in the front.
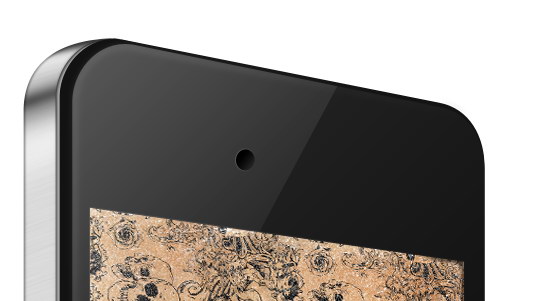
We will draw the front camera now. Use the Ellipse Tool (U) to create an ellipse at the top of the iPhone.
Give the ellipse a Gradient Overlay and Stroke.
Gradient Overlay

Stroke

Here is the basic shape of our front camera:
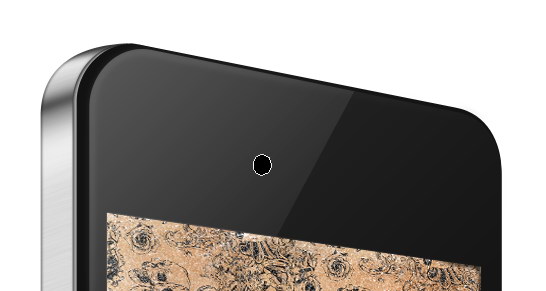
Create a new layer on top of the camera. Use the Brush Tool (B) to paint a white highlight at the right portion of the camera, and then paint a small, black dot next to the highlight.

This is the camera close up:

Step 15: Draw the Receiver
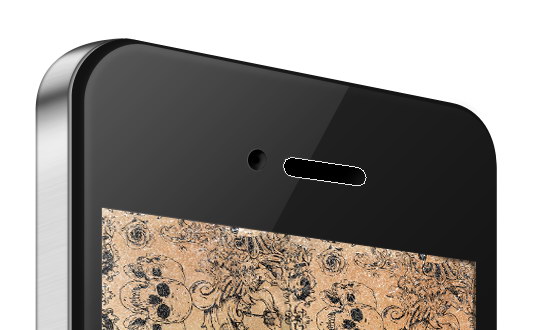
Next, we need to create the iPhone’s receiver. Draw a black, rounded rectangle next to the camera.
Use Edit > Transform > Distort to modify the black, rounded rectangle so that it matches the perspective of the device.
Give the receiver layer a Gradient Overlay and Stroke.
Gradient Overlay
Stroke
Here is the basic shape and color of the receiver:

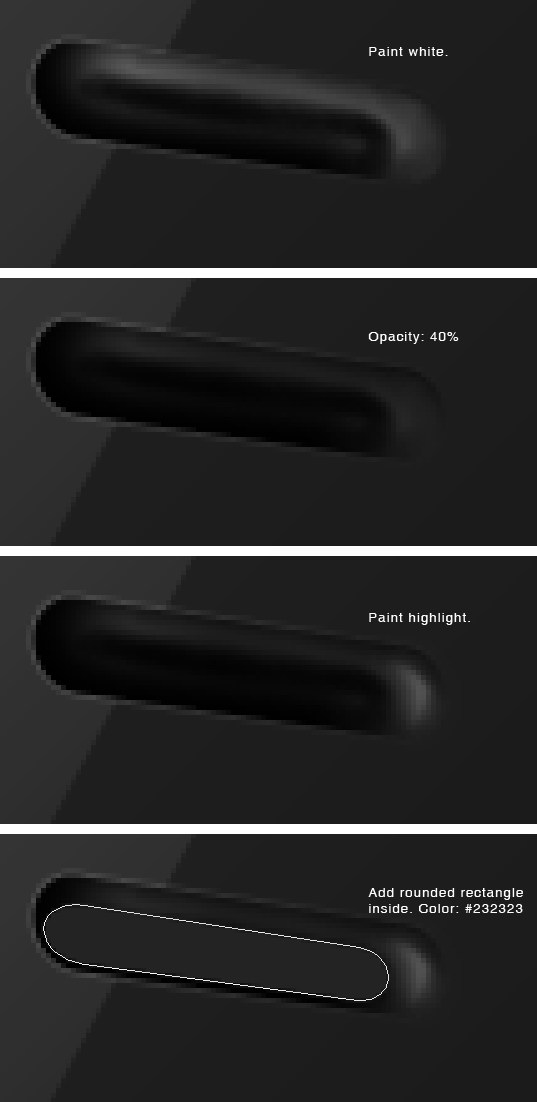
Create a new layer, and on it, use the Brush Tool (B) to paint white on the upper part of the receiver, then reduce the layer’s Opacity to about 40%. Create a new layer again, and paint a stronger highlight. To finish off the receiver, draw a smaller black, rounded rectangle inside of it.
Step 16: Draw the Ring/Silent Switch
The topmost interface component on the side of the iPhone is a switch that toggles between silent mode and ring mode, which is super handy when you are in a team meeting or at a dinner and you don’t want your phone to make a noise when someone calls you.
To draw the ring/silent switch, start by creating a gray, rounded rectangle on the side of the iPhone.
Remember that you need to use Free Transform (Ctrl/Cmd + T) to make modifications to the rectangle so that it matches the overall perspective of our iPhone.
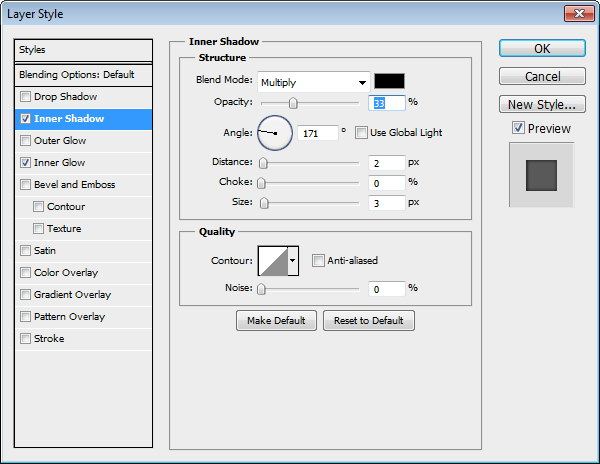
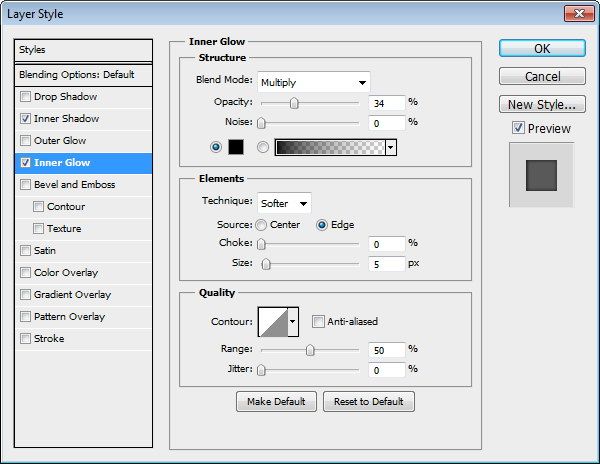
Let’s give the ring/silent switch an Inner Shadow and Inner Glow.
Inner Shadow
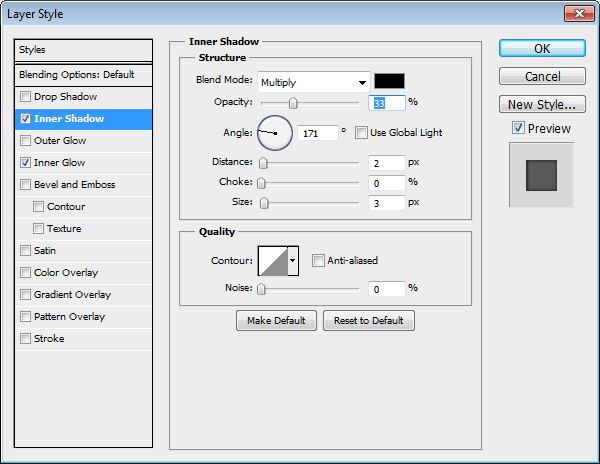
Inner Glow

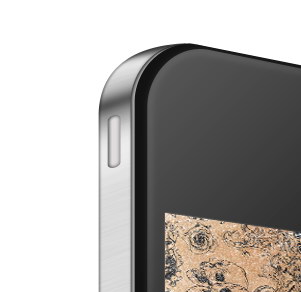
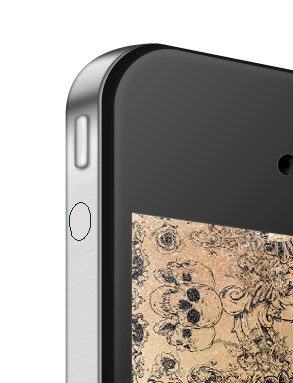
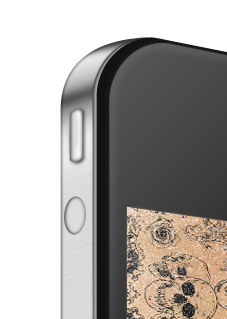
Here is the basic shape and color of the ring/silent switch:
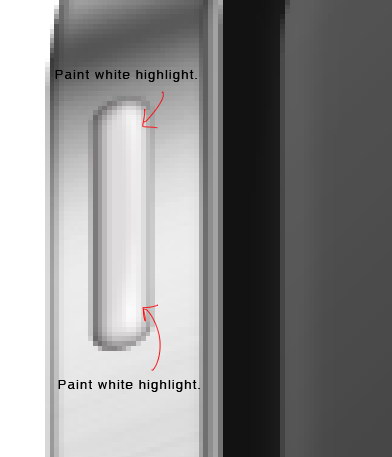
Create a new layer on top of the switch, and then use the Brush Tool (B) to paint white highlights on the layer.
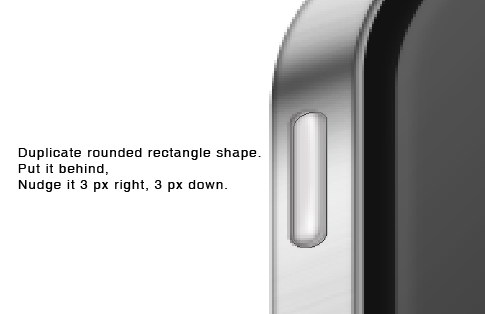
Duplicate the switch layer and place it below the original layer. Switch to the Move Tool (V), then use your arrow keys to nudge the duplicate layer 3px to the right and 3px down.
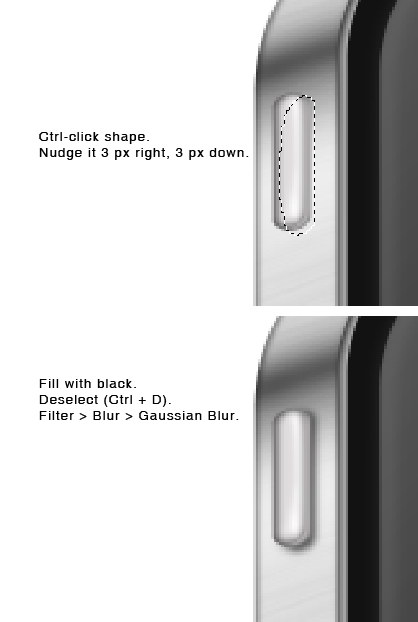
Load a selection around the duplicate layer by Ctrl/Cmd + clicking on it in the Layers Panel. Nudge the selection 3px to the right and 3px down.
Create a new layer and fill (Shift + Backspace or Edit > Fill) it with black. Soften it using the Gaussian Blur filter.
Step 17: Draw the Volume Buttons
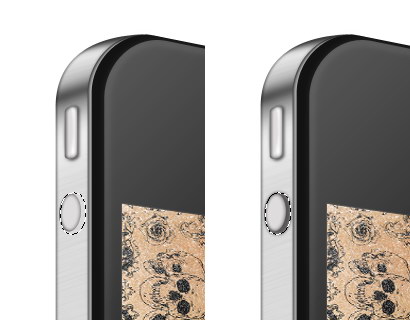
The round buttons below the ring/silent switch of the iPhone 4 are volume buttons that control the volume of the receiver and speakers (which are not shown because they are located at the bottom of the iPhone).
Let us draw the “volume up” button first; use the Ellipse Tool to draw a round shape below the ring/silent switch.
Give the layer an Inner Shadow and Inner Glow.
Inner Shadow
Inner Glow
Here is the basic shape and color of the “volume up” button:
Create a new layer behind the button. Next, use the Elliptical Marquee Tool to create an elliptical selection that is bigger than the button.
On the new layer, fill the selection with black. Give the layer a Gaussian Blur.
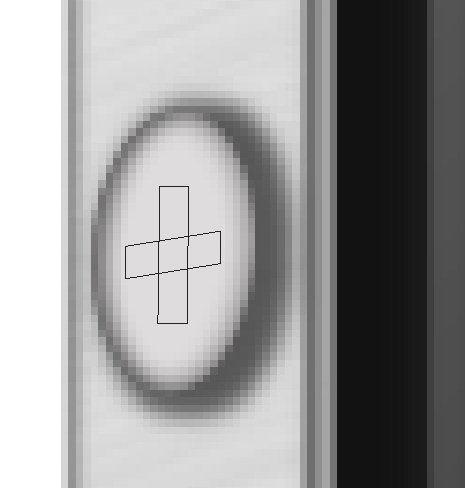
Draw a plus (+) sign on the button by intersecting two rectangles.
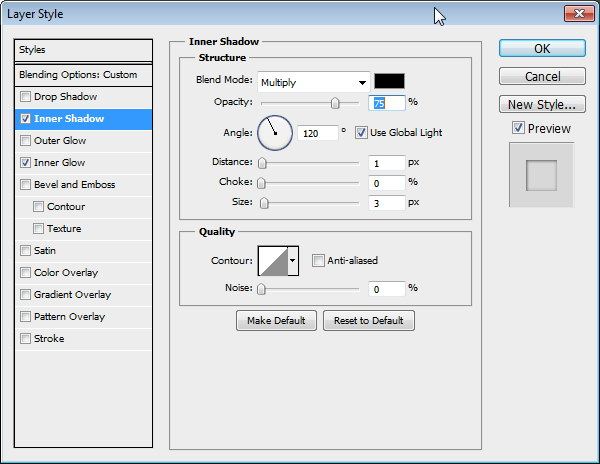
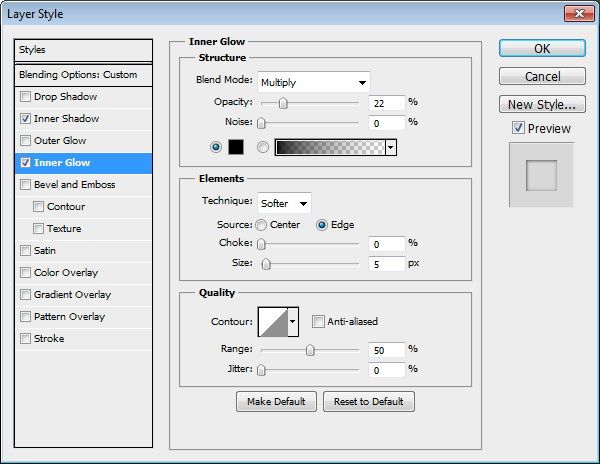
Give the plus sign an Inner Shadow and Inner Glow.
Inner Shadow
Inner Glow
Repeat the previous process to create the “volume down” button that should be below the “volume up” button.
Step 18: Create a Divider
There is this divider on the sides of the iPhone 4, toward the bottom. To create this divider, start by drawing a black, rectangular shape–draw it thinly.
Use the Pen Tool (P) to add new anchor points to the rectangle, and pull these anchor points up to match the perspective of the iPhone.
The following image shows a close-up of the divider:
Step 19: Creating a Realistic Shadow
As a finishing step, let us give the iPhone a drop shadow. Many designers will just draw a black line or rectangle and then blur it using either the Gaussian Blur or Motion Blur filter to create shadows of an object they are drawing. However, if you are striving to make your artwork look as realistic as possible, that technique, most of the time, is not good enough.
In reality, you almost never find a solid, unified, and uniform shadow.
We must remember that light bounces off on various portions of an object, and so the variations on the shadow’s shape are not uniform. Even though we have one light source, we will have multiple shadows in the end. Oftentimes, in order to achieve this outcome, we must manually paint and tweak an object’s shadow.
Start by using the Brush Tool (B) to paint a soft, dark gray horizontal line beneath the iPhone.

Create new layer and paint another soft, dark gray line–this time, make it bigger and softer than the previous one.
Create a new layer again.
Paint under the iPhone again, but make this one a bit darker.
Create another new layer. Use the Polygonal Lasso Tool (L) to make a selection as shown below, then fill the selection with black.
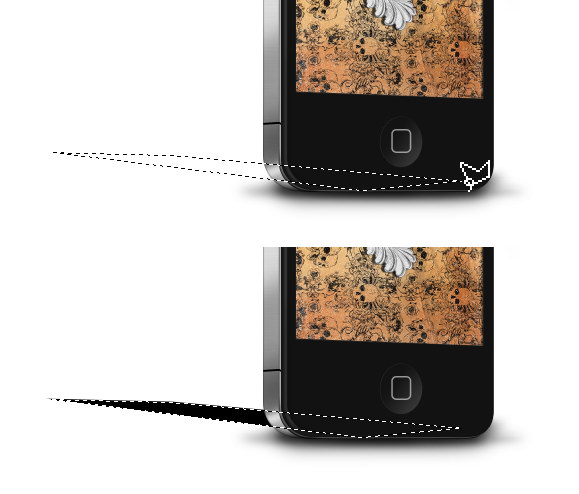
Use the Gaussian Blur filter to soften the shadow.
Switch to the Eraser Tool (E).
Use a very big brush size and set the Eraser Tool’s Opacity option to 10-15%. Erase some parts of the shadow. If you find that the shadow is still too prominent, use the Gaussian Blur filter again to soften it and make it more subtle.
Repeat the previous process to create another shadow.
Tutorial Summary
In this tutorial, we created a realistic iPhone 4 from scratch using various shape tools, the Pen Tool, the Stroke command, layer styles, Photoshop filters like Gaussian Blur, and more.
In the process of constructing the iPhone in Photoshop, I hope that I have shown you that every little detail counts.
We paid a lot of attention to perspective and the small things that make a world of difference when it comes to trying to achieve realistic-looking objects that are drawn digitally. For example, we made sure that the iPhone’s drop shadow is accurate, that the minute details of even a tiny component such as the front camera is just right, and that the different components of the mobile device match the perspective that we have established.
I hope you can use the techniques I’ve shared with you here when drawing your own realistic products. Share your thoughts, questions, and results in the comments and in our community Flickr group pool.
Download Source Files
- realistic_iphone4 (ZIP, 4.30 MB)
-
 Trevin serves as the VP of Marketing at WebFX. He has worked on over 450 marketing campaigns and has been building websites for over 25 years. His work has been featured by Search Engine Land, USA Today, Fast Company and Inc.
 -

WebFX is a full-service marketing agency with 1,100+ client reviews and a 4.9-star rating on Clutch! Find out how our expert team and revenue-accelerating tech can drive results for you! Learn more
Make estimating web design costs easy
Website design costs can be tricky to nail down. Get an instant estimate for a custom web design with our free website design cost calculator!
Try Our Free Web Design Cost Calculator
Table of Contents
- Preview
- Preliminary Step: Research
- Step 1: Draw the iPhone Face
- Step 2: Create the iPhone’s Side
- Step 3: Shading the iPhone’s Side
- Step 4: Create a Hard Edge
- Step 5: Applying a Stainless Steel Texture
- Step 6: Create an Inset Edge
- Step 7: Darken the Lower Part
- Step 8: Create the Screen of the iPhone
- Step 9: Give the Screen an Inner Shadow
- Step 10: Add a Wallpaper
- Step 11: Create a Reflection on the iPhone’s Face
- Step 12: Create an Edge Highlight on the iPhone Face’s
- Step 13: Draw the Home Button
- Step 14: Draw the Front Camera
- Step 15: Draw the Receiver
- Step 16: Draw the Ring/Silent Switch
- Step 17: Draw the Volume Buttons
- Step 18: Create a Divider
- Step 19: Creating a Realistic Shadow
- Tutorial Summary
- Download Source Files
Share this article


Web Design Calculator
Use our free tool to get a free, instant quote in under 60 seconds.
View Web Design Calculator
Make estimating web design costs easy
Website design costs can be tricky to nail down. Get an instant estimate for a custom web design with our free website design cost calculator!
Try Our Free Web Design Cost Calculator