
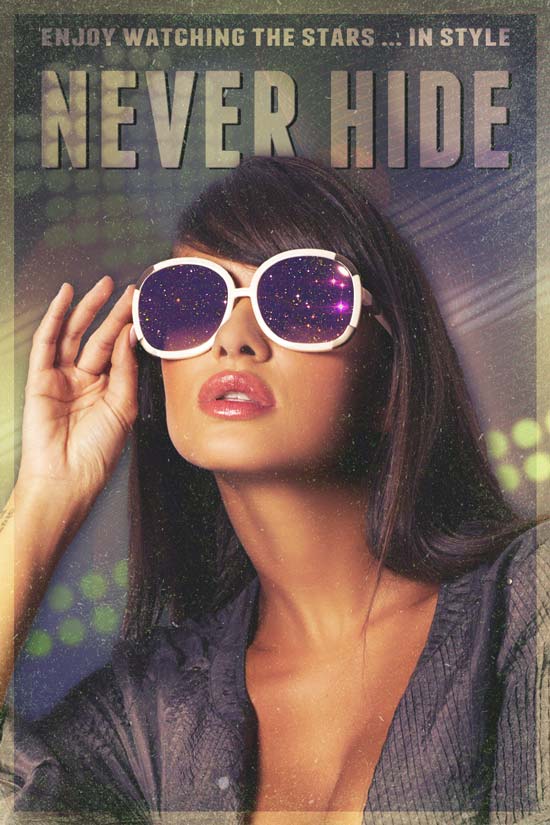
Preview

Tutorial Resources
- Brush library: Line Brushes (by QBrushes)
- Stock photo: Pure sexy (by Daniel Sroga)
- Stock photo: Capodimonte Deep Field (by ESO)
- Font: Franchise (by Derek Weathersbee)
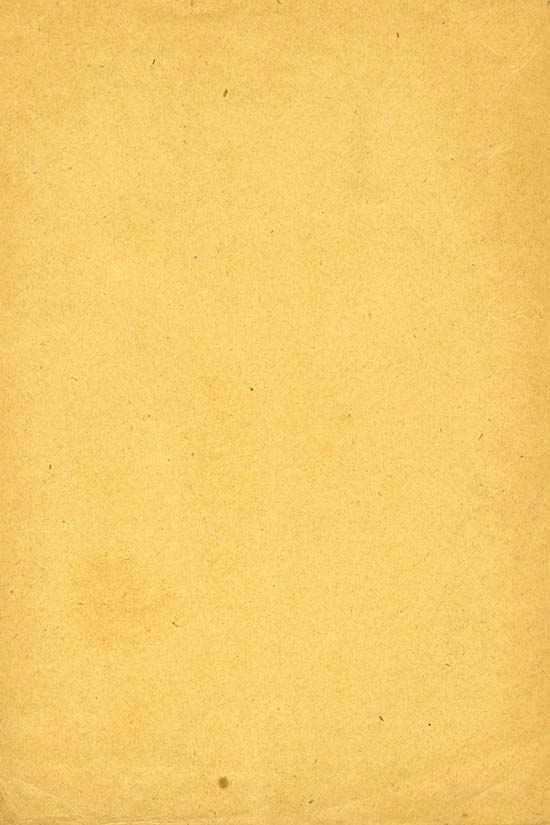
- Texture: Old paper texture 1 (by MaX Triet)
Step 1: Set Up the Photoshop Document
Open up Photoshop and create a new document (Ctrl/Cmd + N) with your desired canvas size (mine is 800x1200px) and then fill the Background layer with dark gray (#181a1c).

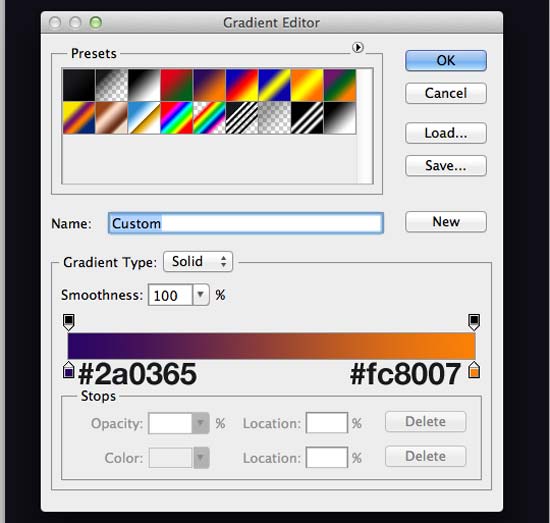
Step 2: Add a Gradient Map Adjustment Layer
Go to Layer > New Adjustment Layer > Gradient Map. Set the new layer’s Blend Mode to Overlay and 50% Opacity.
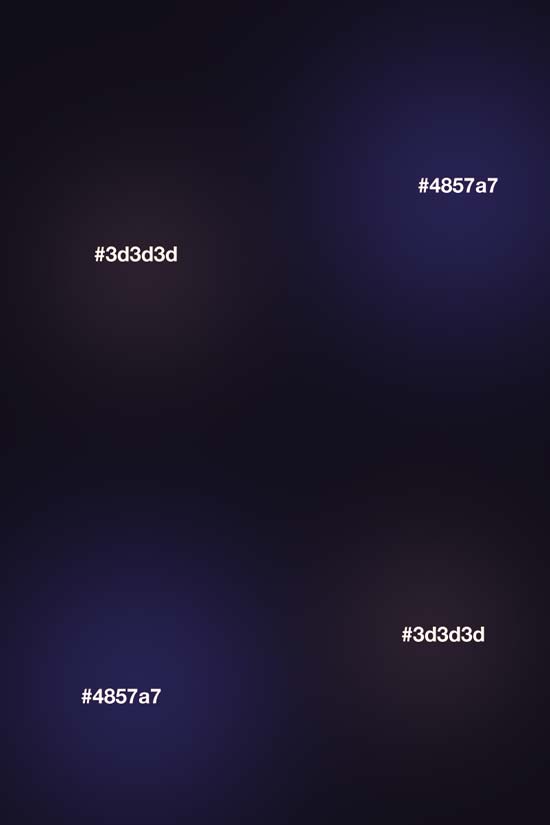
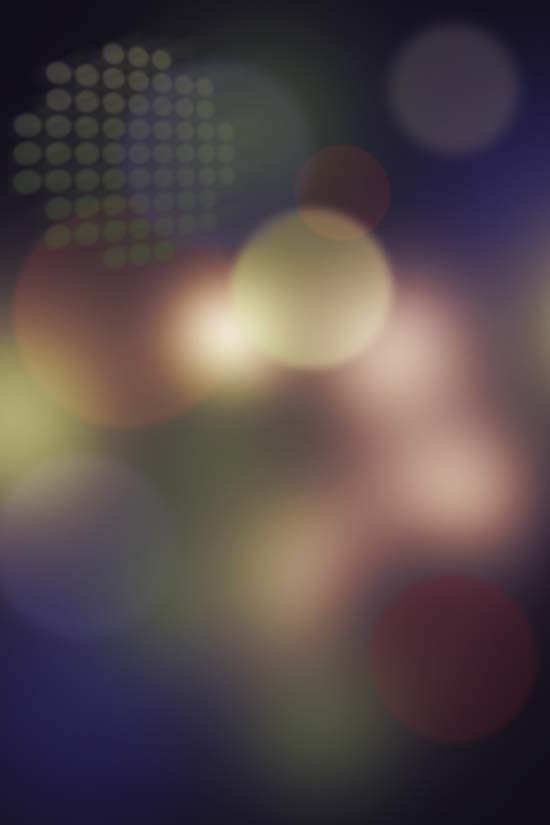
Step 3: Create Light Spots
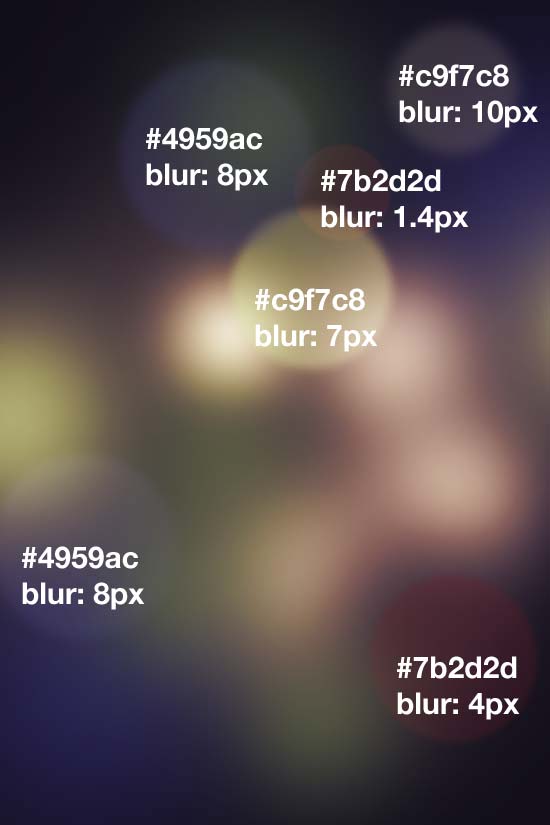
Create a new layer just above the Background layer (but below the Gradient Map adjustment layer that we created in the last step). Next, use the Brush Tool (B) with a large, soft brush to paint two blue spots (#4857a7 – Flow option at 50%) and two dark gray ones (#3d3d3d – Flow at 80%).
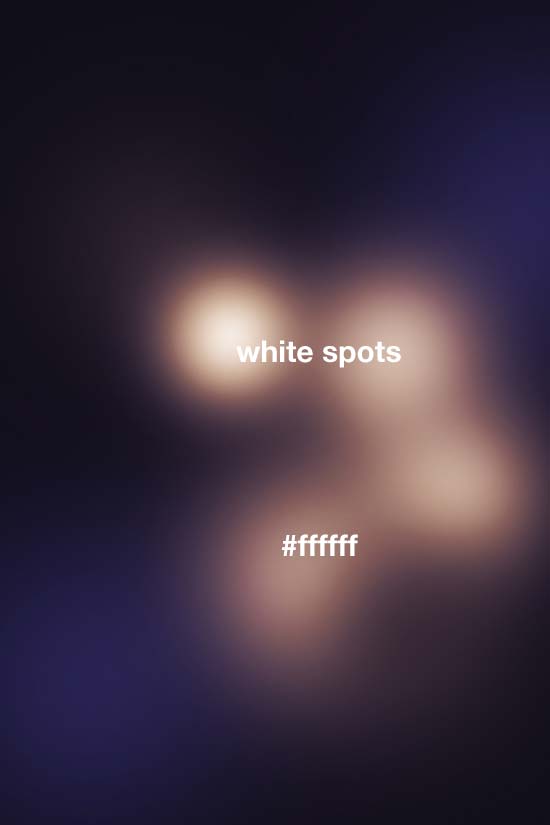
Create two new layers — one above and the other beneath the previous layer — and then paint soft, white glows (play around with the Flow option to get your desired outcome).
As you can see below, the Gradient Map adjustment layer does the rest of the work.
Start using other colors (such as #c9f7c8 and #691167) and play around with the Flow option and the order of the layers until you are satisfied.

With the Ellipse Tool (U), draw circles in random locations, with each circle drawn in its own separate layer.
Experiment with the order of the layers as well.
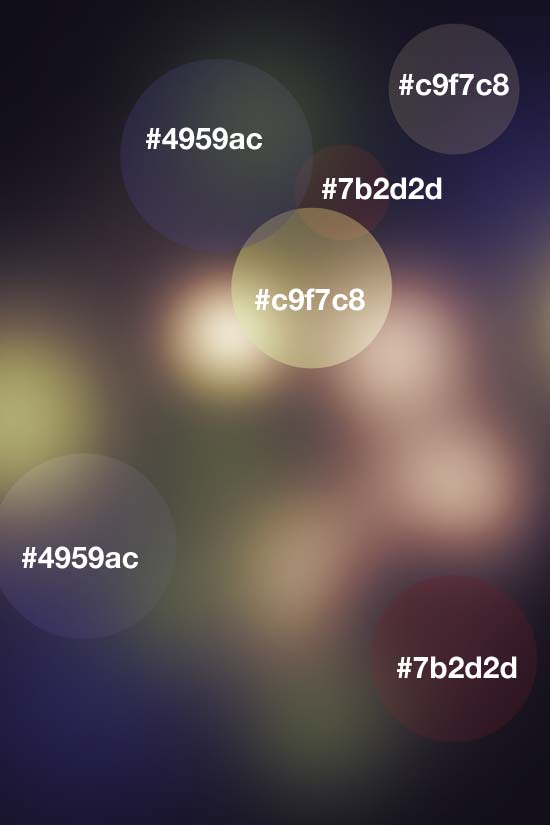
Select a circle layer and then go to Filter > Blur > Gaussian Blur. Do the same with the other circle layers, using varying Radius values for the Gaussian Blur filter.
Step 4: Create an Abstract Design Element
Draw one small green circle (#69aa67) using the Ellipse Tool (U).

Select the circle, hit Cmd/Ctrl + Alt/Option + T, and move it to the right to copy it.

Duplicate the circle again by pressing Cmd/Ctrl + Shift + Alt/Option + T. Repeat this until you have something similar to the image below.

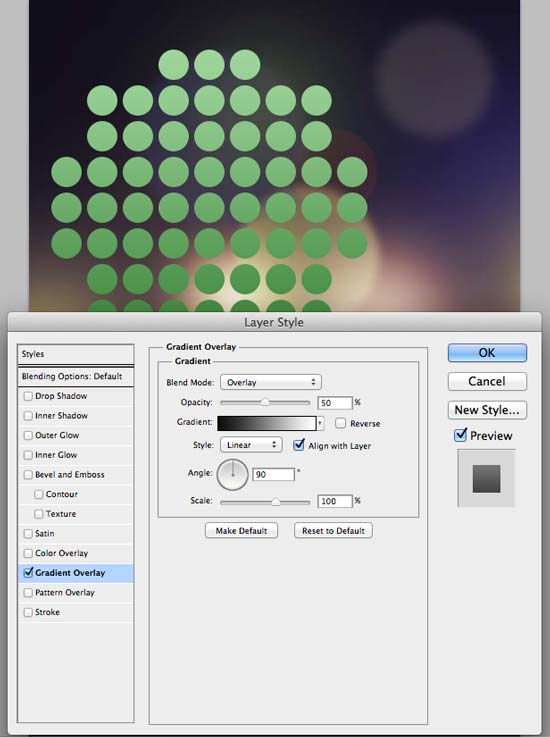
Double-click on the layer to access the Layer Style dialog window and then give it a Gradient Overlay layer effect.
Use the Gaussian Blur filter (Filter > Blur > Gaussian Blur) with Radius set to 2px.

Scale the abstract shape down a bit, as well as adjust its perspective using Free Transform (Cmd/Ctrl + T).
Afterwards, lower the layer’s Opacity to 27%.
Duplicate this layer (Cmd/Ctrl + J) and then apply the Motion Blur filter (Filter > Blur > Motion Blur) on the duplicate layer.
Set the layer’s Opacity to 27% as well.
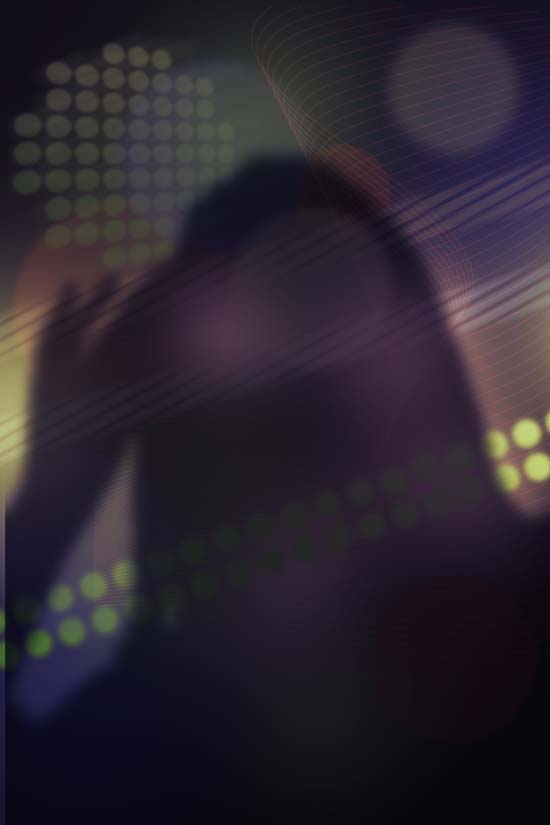
Step 5: Create a Row of Dots and Stripes
Create two long rows of dots (with the Fill color set to a green color, #69aa67) using the method explained in the previous step. Angle it slightly with Free Transform.

Give the layer a Gaussian Blur with Radius set to 4px.
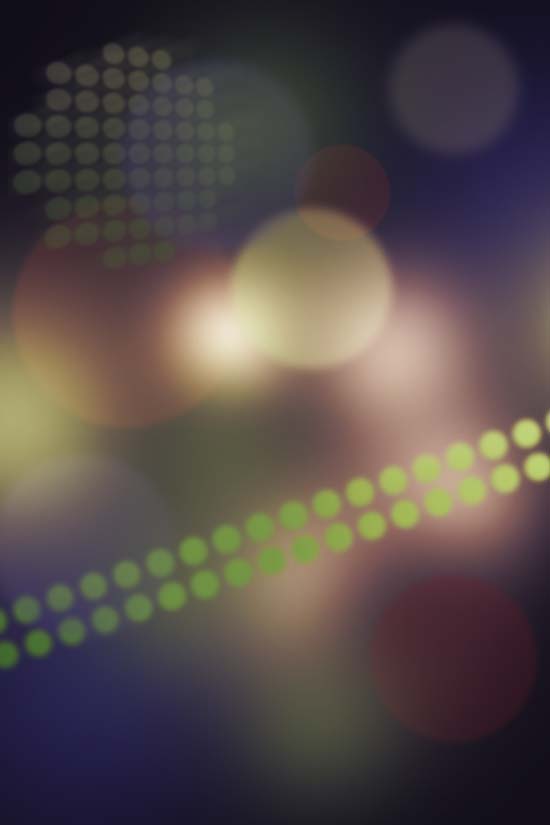
Next, create a single row of dots (using the Fill color: #8bd7f1) and again angle it a bit with Free Transform.

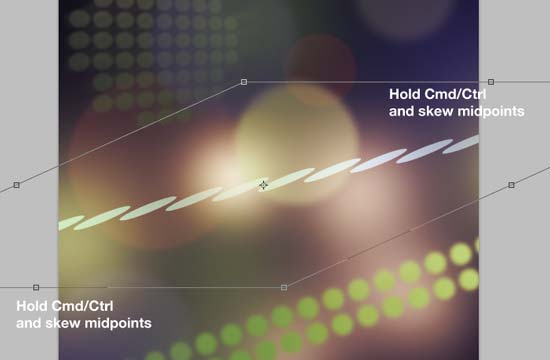
Go to Edit > Transform > Skew and skew the upper and lower midpoints of the shape while holding Cmd/Ctrl. That will skew the dots into stripes.
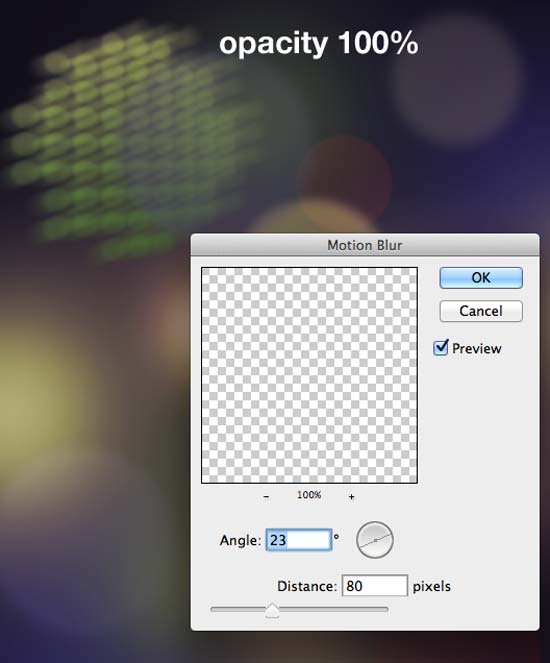
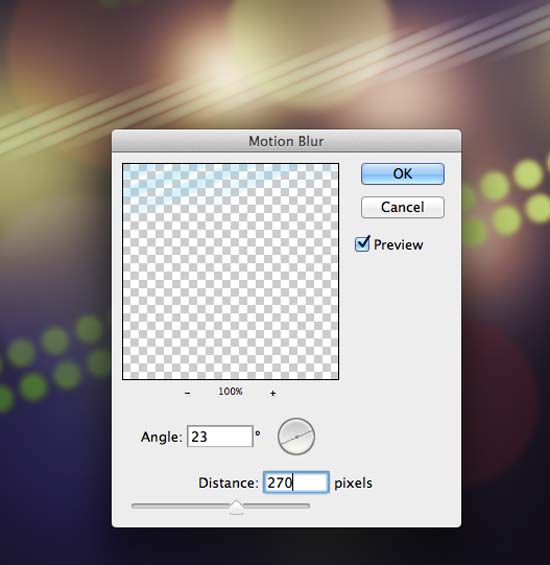
Go to Filter > Blur > Motion Blur and use the settings shown below.
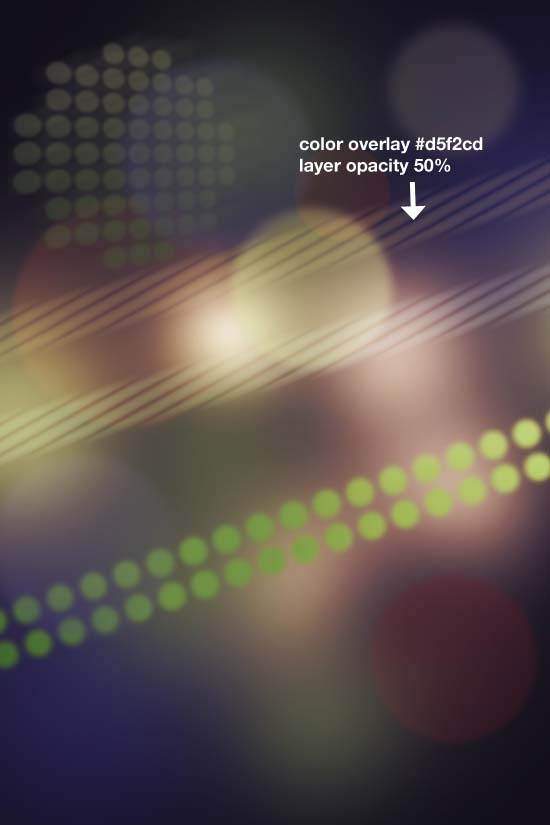
Duplicate the layer, move the duplicate up a bit, double-click the layer to open up the Layer Style dialog window, and then give the layer a Color Overlay with a faded green color (#d5f2cd).
Afterwards, lower the Opacity of the layer to 50%.
Download and install the Line Brushes brush library. Choose the Brush Tool (B) and pick one brush from the library (I used line-brush36.eps), set your Foreground color to red (#5b1414) and, on a new layer, apply the brush once.
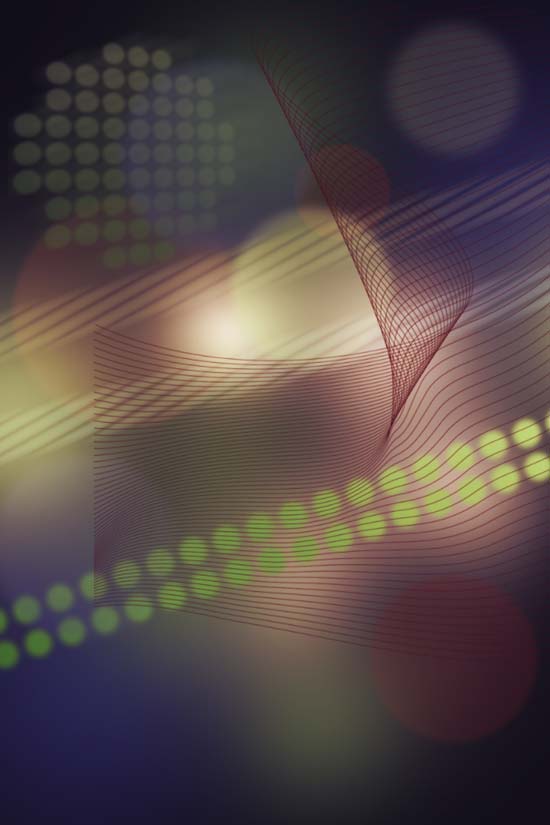
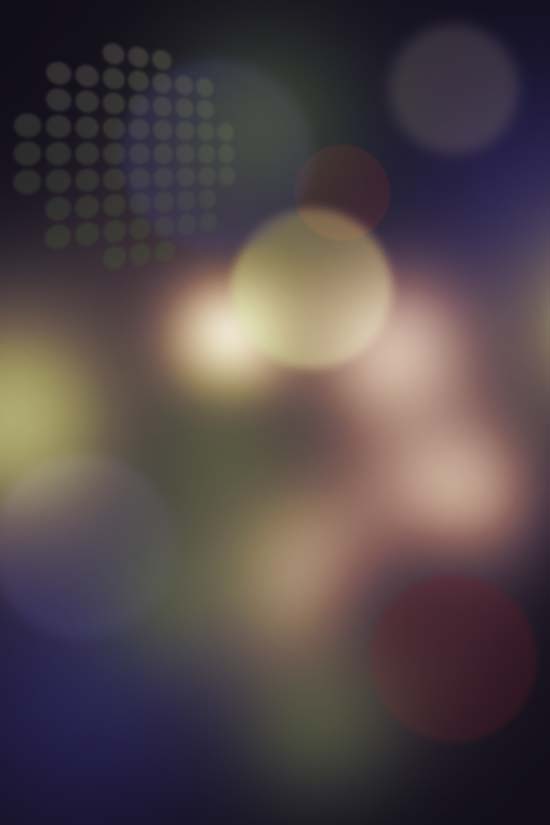
Set the layer’s Blend Mode to Screen.
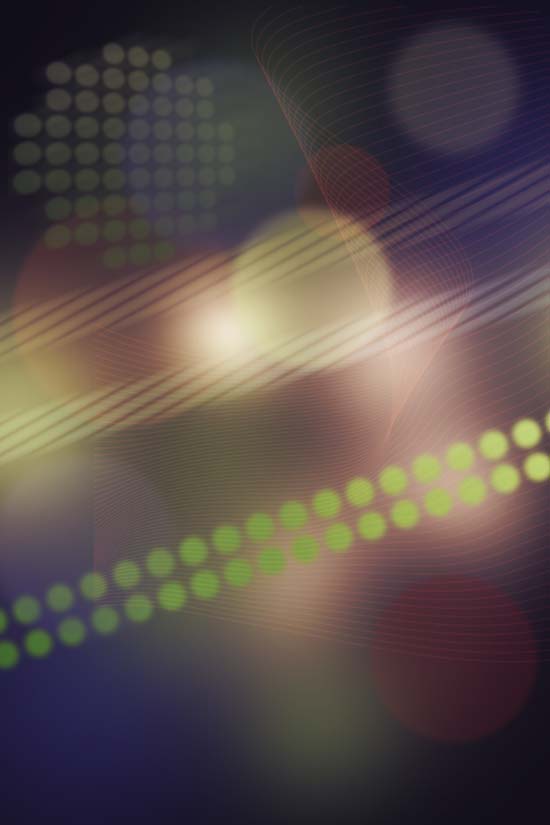
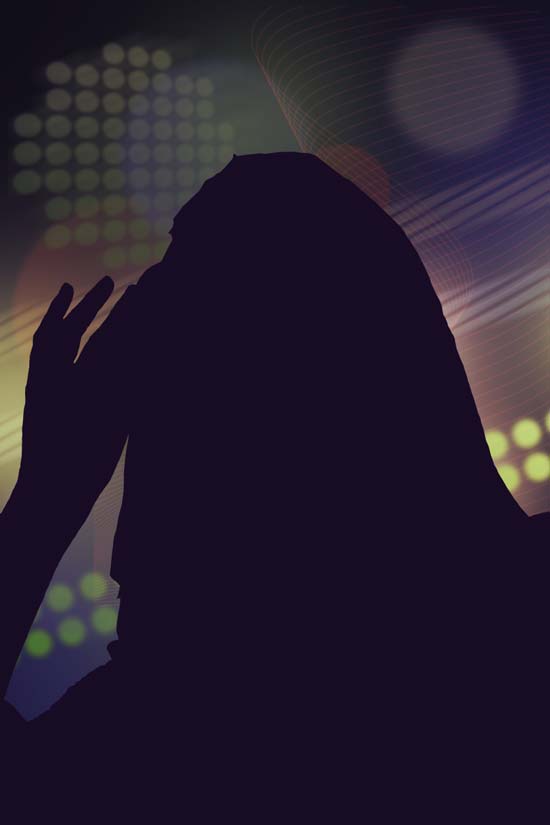
The background for our artwork is now completed.
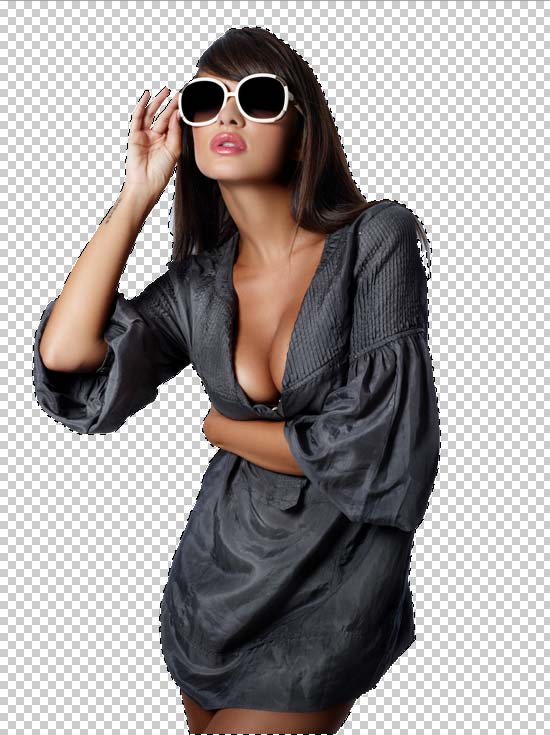
Step 6: Place the Subject into the Poster
Download and open up the Pure sexy stock photo in Photoshop. Extract the subject from her background using the Pen Tool (P) and place her into our design.

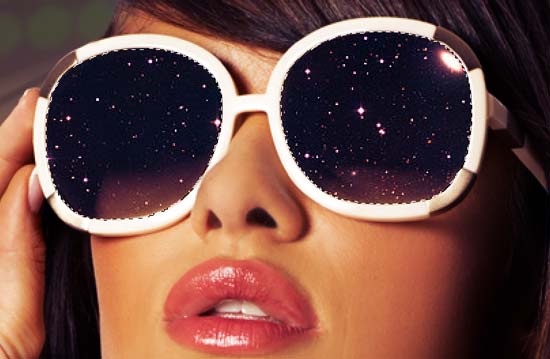
Step 7: Create Cosmic Sunglasses
Download and place the Capodimonte Deep Field photo into our design, scale it down using Free Transform and also change its layer’s Blend Mode to Screen.

Pick up the Pen Tool (P), trace around the edges of our subject’s sunglass lenses, right-click on the path in the canvas and choose Make Selection from the contextual menu that appears.

Go to Layer > Layer Mask > Reveal Selection.
Once again, import the Capodimonte Deep Field image into our design, scale it down using Free Transform (Cmd/Ctrl + T) and then move it down a bit using the Move Tool (V).
Adjust the Hue/Saturation (Image > Adjustments > Hue/Saturation).
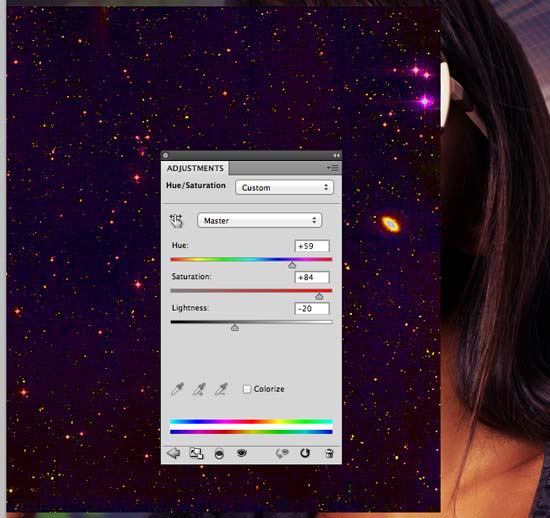
Trace around the sunglass lenses again (with the Pen Tool) and create a layer mask.

Change the Blend Mode of the layer to Screen.


Step 8: Create a Shadow
Create a new layer just beneath the girl’s layer.
Cmd-click/Ctrl-click on the girl’s layer thumbnail in the Layers Panel to create a selection around her, click on the new layer just beneath the girl’s layer to make it the active layer, then fill the selection with a dark purple color (#21172a).
Run the Gaussian Blur filter on the layer with the Radius set at 10px. Nudge the shadow down and right a bit using the Move Tool (V). Then change the Blend Mode of the layer to Multiply and set the Opacity to 70%.

Step 9: Add Some Text
It’s time to add some text to our composition.
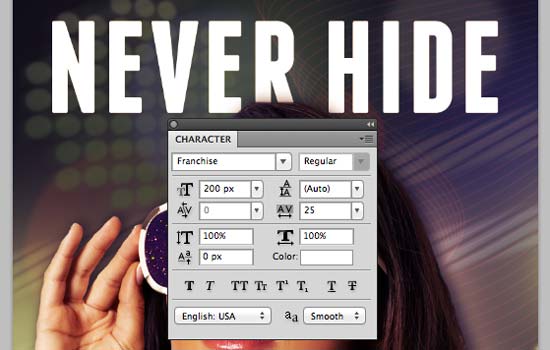
Download and install (if you don’t have it already) the Franchise font. With the Horizontal Type Tool (T), add some text onto the canvas. Put this text layer just below the girl’s shadow layer.
Cmd-click/Ctrl-click on the text layer’s thumbnail to put a selection around the text, create a new layer below the text layer and then fill the selection with black (#000000) on that new layer.
Deselect the selection (Cmd/Ctrl + D) and then use the Move Tool (V) to move the layer rightward and downward by a few pixels.

Again, Cmd-click/Ctrl-click on the text layer’s thumbnail to load a selection, then go to Select > Modify > Expand Selection and expand it by 1px.
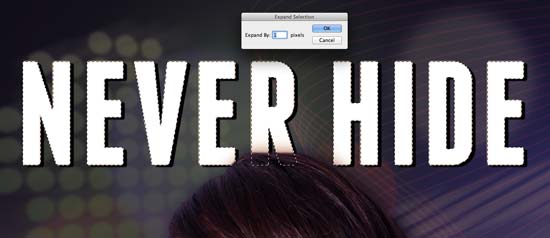
Hit the Backspace key to delete the selected areas.

Select the text layer and change the Blend Mode to Soft Light.
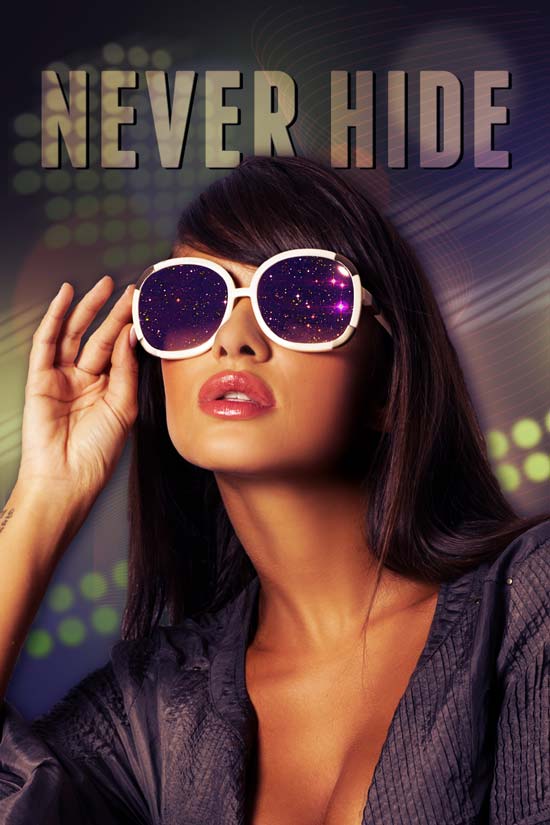
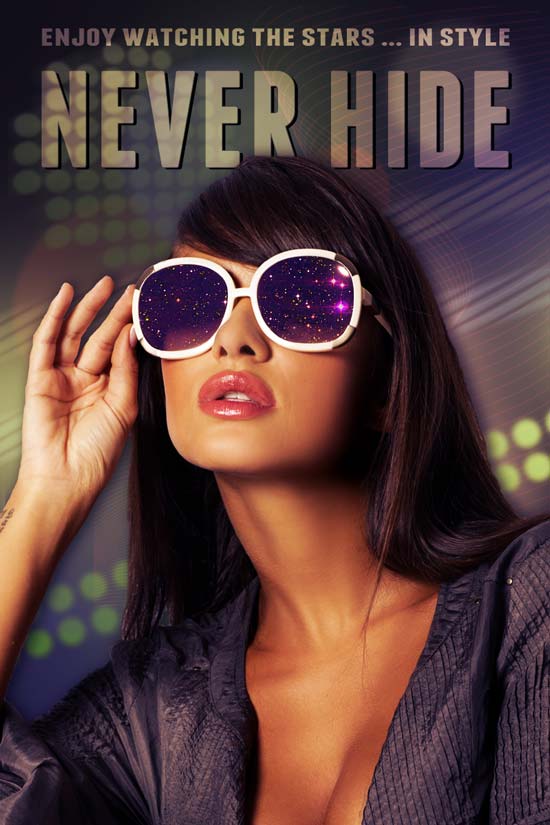
Using the same font, add one more line of text and set the Blend Mode of the resultant text layer to Soft Light.

Duplicate the text layer (Cmd/Ctrl + J), change Blend Mode of the duplicate layer to Overlay and lower the layer’s Opacity to 30%.
Step 10: Create the Poster’s Border
Hit Cmd/Ctrl + A to place a selection around the canvas.
Create a new layer above the Gradient Map layer we added earlier in this tutorial. Go to Edit > Stroke to create a 20px stroke using a faded yellow color (#fdf1ac).
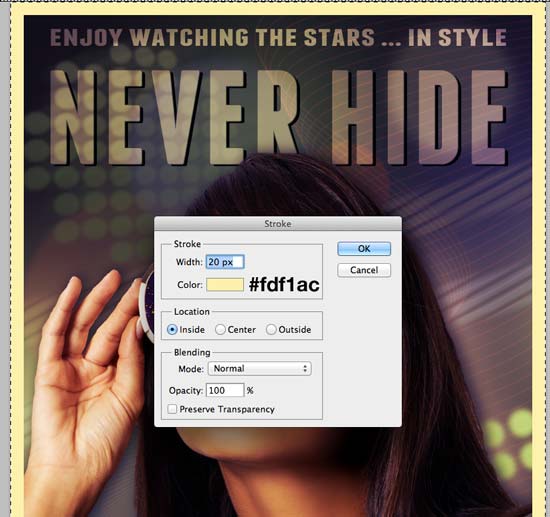
Change the Blend Mode of the border layer to Soft Light.

At this point, we could choose to stop. We have a nice, abstract, vintage-looking poster.
However, we will move on and add some texturing next (as the final step).
Step 11: Adding a Texture Effect
Download and import the Old paper texture 1 texture in our design.
Resize the texture to fit our canvas using Free Transform.
Duplicate the texture layer and, for now, hide the duplicated layer.
In the Layers Panel, click on the visible texture layer to make sure it’s the active layer, then desaturate it (Cmd/Ctrl + Shift + U).

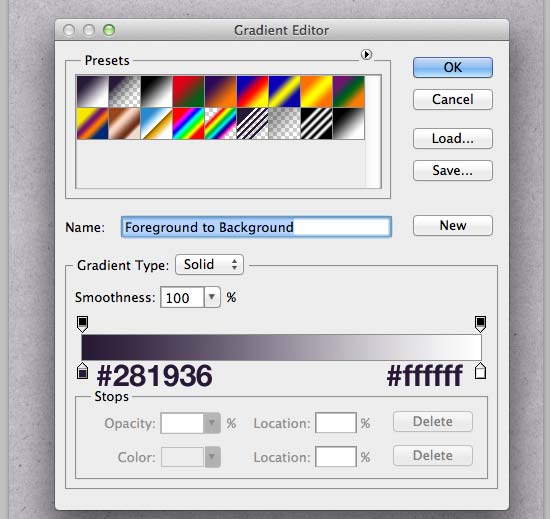
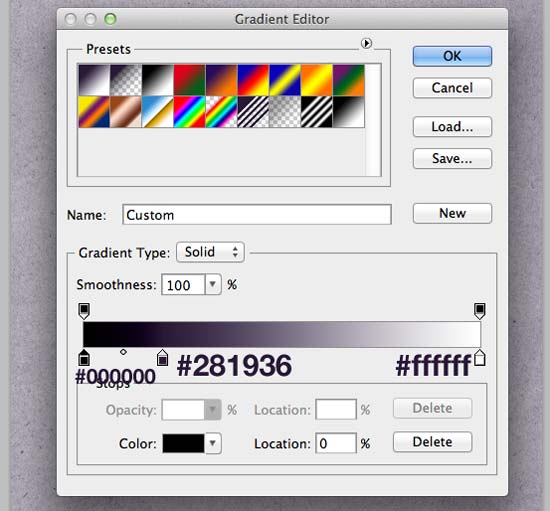
Go to Image > Adjustments > Gradient Map and use the settings shown below.
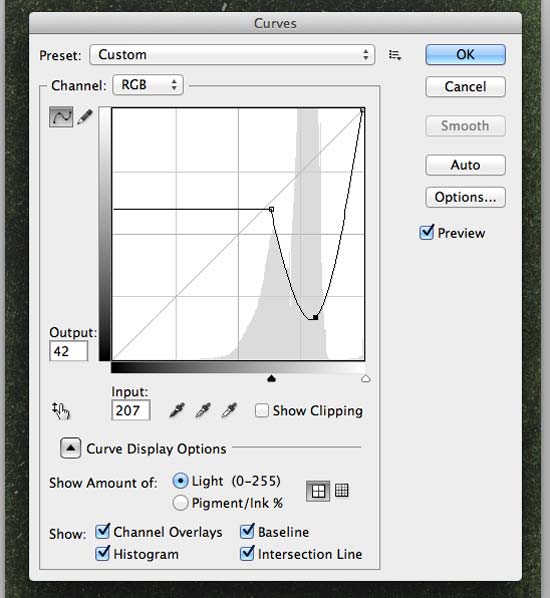
Do a Curves adjustment (Image > Adjustments > Curves).
Set the layer’s Blend Mode to Screen and Opacity to 50%.
Unhide the texture we hid earlier in this step, desaturate it, and adjust the image using Gradient Map (Image > Adjustment > Gradient Map).
Go to Image > Adjustments > Curves.

Change the layer’s Blend Mode to Multiply and lower the Opacity to 20%.
As a final touch, you can add some branding to the design (i.e. a sunglasses manufacturer’s logo).
![]()
Tutorial Summary
We used simple but powerful Photoshop tools such as drawing basic shapes, brushes, layer styles, layer masks, Free Transform, and filters to achieve the final design. Don’t be afraid to give yourself some room for experimentation.
Try different things at different parts of this tutorial to see what results you could come up with.
Download Source Files
- glamorous_vintage-style_poster (ZIP, 20.1 MB)
-
 Trevin serves as the VP of Marketing at WebFX. He has worked on over 450 marketing campaigns and has been building websites for over 25 years. His work has been featured by Search Engine Land, USA Today, Fast Company and Inc.
 -

WebFX is a full-service marketing agency with 1,100+ client reviews and a 4.9-star rating on Clutch! Find out how our expert team and revenue-accelerating tech can drive results for you! Learn more
Make estimating web design costs easy
Website design costs can be tricky to nail down. Get an instant estimate for a custom web design with our free website design cost calculator!
Try Our Free Web Design Cost Calculator
Table of Contents
- Preview
- Tutorial Resources
- Step 1: Set Up the Photoshop Document
- Step 2: Add a Gradient Map Adjustment Layer
- Step 3: Create Light Spots
- Step 4: Create an Abstract Design Element
- Step 5: Create a Row of Dots and Stripes
- Step 6: Place the Subject into the Poster
- Step 7: Create Cosmic Sunglasses
- Step 8: Create a Shadow
- Step 9: Add Some Text
- Step 10: Create the Poster’s Border
- Step 11: Adding a Texture Effect
- Tutorial Summary
- Download Source Files
Share this article


Web Design Calculator
Use our free tool to get a free, instant quote in under 60 seconds.
View Web Design Calculator
Make estimating web design costs easy
Website design costs can be tricky to nail down. Get an instant estimate for a custom web design with our free website design cost calculator!
Try Our Free Web Design Cost Calculator
